Grunt-Jackal spawning trick
Posted May 17th 2015
Associated movies
- Introduction
- The trick
- Checkpointing afterwards
- Horde evolution and numbers
- Counting your horde
- Drawbacks with high numbers
- Passage battle
- Muster bay battle
- Further remarks
Introduction
When MELEE reported some mysterious freaky spawning aboard ship while playing the Master Chief Collection's version of Halo, I did a little fiddling around on my Xbox to see if I could get it happening in the original game. Bearing in mind the countless times I've played the level in the past, I wasn't surprised to draw a blank, and in any case the freakiness may be something specific to MCC - we don't know yet. But when I cottoned on to a spawning dynamic in a different place, I did get some other gawp-worthy mojo going on, the like of which I've never seen before in the game.
After completing the boarding battle on the ship, it's possible to build up an amazing horde of Grunts and Jackals in the passage network running alongside the boarding room. There's a slow but steady spawning dynamic involved, and basically all you need to do is exploit it right - there's kind of a trick to that - and let the numbers build up. You don't even need to monitor things; you can leave your machine running and come back later. After 20 minutes you could already have close to 50 critters, but you can take things a good way further if you like. I've been up as high as 131, which I think is close to the limit as the game gets rather overloaded!
They spread out quite a way, but at the spawning area itself - at the start of the main passage - you eventually get a dense and very grunty jumble reaching up to the ceiling. Quite a sight - which I used for my two-minute teaser BCM144.
When you've got enough critters to satisfy yourself, it's possible to then get a checkpoint, allowing you to repeatedly have various types of fun with your horde, including serious combat. You can also get them moved along to the upper level of the muster bay, giving you a second venue for a slaying extravaganza. Basically the trick opens the door to a whole heap of new fun to explore. So what are we waiting for? Let's get to it!
The trick
In this core section I'll detail the spawning dynamic in question, and the trick of using it to build up a horde. The routine is also shown in my tutorial movie BCM145. You can use any difficulty level, but Easy is best if you're interested in getting close to your horde without being cloaked. If it's combat you're after though, you'd surely want Normal or higher. Talking of the active camouflage, you should leave that unused for now as it can come in handy for having fun with your horde.
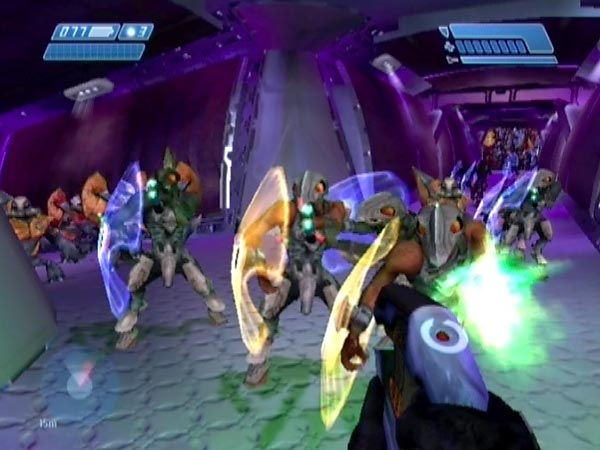
Initial killing
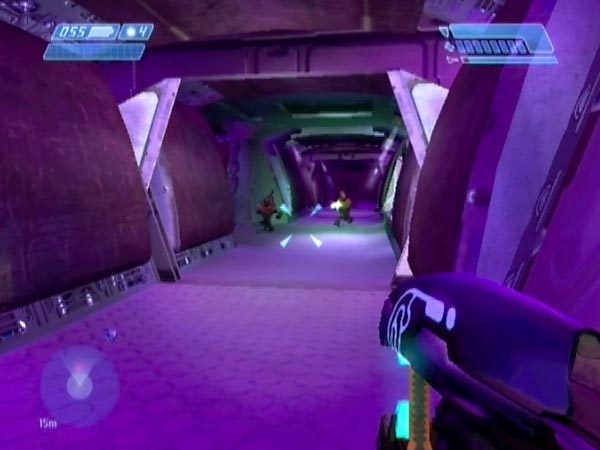
After the boarding battle the game opens a critical door in the adjoining passage network, allowing you to head for the upper level of the muster bay. Through the door there's a corner area which I'll call the spawn trigger zone - see pic for delineation - followed by a rise. There are one or two Grunts behind the door, a few up the rise with an Elite who comes running into view, and also a few troops in a side-passage. Quickly kill them all but stay back from the muster bay trigger line at the top of the rise (see other pic). I recommend using a plasma weapon, blitzing the side-passage guys before the top guys; a job of mere seconds. On Heroic or Legendary you might want a plasma pistol for stunning an Elite before finishing him with a tag or whatever, else things can get a little rough.
As long as you haven't reached that line yet, the aforementioned zone acts as a trigger area for the spawning of Grunts and Jackals at the start of the long level passage running alongside the boarding room. It's the game's way of giving you a little surprise from behind if you're dawdling I guess. You already triggered a first wave when you entered it. Thing is, this spawning can go on and on, albeit very slowly. When you're in the zone - which you should now return to - the game continually checks whether to spawn a new wave, randomly comprising either two Grunts or one Jackal, and it'll go ahead if a certain period has elapsed since the last.
On PAL Xbox the period starts off as exactly 38.48 seconds (the fraction accounts for 12 frames at 25 fps), while on NTSC/PC I think it's around 32 seconds. But in due course the period starts to lengthen, apparently due to the strain the game is coming under from handling the growing number of covies. It can still be unchanged after you've got 40 covies, but by the time you've got 80 for example, it could be around 30% longer. If you move out of the zone, spawning will simply be suspended until you move back in.
Accumulation via standoff mode
Because the spawning goes on and on, you may already be thinking that you can just wait in the trigger zone and let the numbers build. There's a problem though. The spawnees are normally in an attack mode, making them close in on you (within certain limits), forcing you to kill them off in self-defence. Obviously no good. The key is to instead get them switched to what I'll call standoff mode. In that mode they don't come further than the final short side-passage, which they like to enter. The mode will apply not just to the existing critters but all later ones too. You can then wait safely out of sight just around the corner yet still within the trigger zone, and the numbers will build up, stretching from that side-passage back to the spawning area.
So, how do you get standoff mode? Despite a lot of investigation I couldn't pin down an exact cause for the switch, and there seems to be some randomness involved anyway, so my recipe is a simple retry affair. Each time you find that you've got attack mode, just revert and try again. A try doesn't take long and it shouldn't take many before you get lucky, so you'll hopefully succeed within a few minutes. If you want to really minimize the time per try, delay the previous checkpoint (the 'door release checkpoint' - see later) until you're just about to enter the spawn trigger zone, having slain the door Grunt (or Grunts) beforehand. Tries can then take a mere 30 seconds or so. Don't be cloaked however, as it seems to greatly reduce the chance of success per try.
Assuming the chances of a Grunt spawn versus a Jackal spawn are 50-50, which seems borne out by some testing, that means the average number of covies per spawn is 1.5 and hence (multiplying by 60/38.48), the average spawn rate is initially about 2.3 covies per minute on PAL Xbox (a bit more on NTSC/PC), though it'll progressively reduce as the spawn period lengthens. You could be up near 50 in just 20 minutes - a good crowd.
Note: If you're trying to get as many covies as possible, be sure to look away from any covie bodies so the game will be free to remove them and thus potentially gain extra capacity for spawning.
Watching the spawning
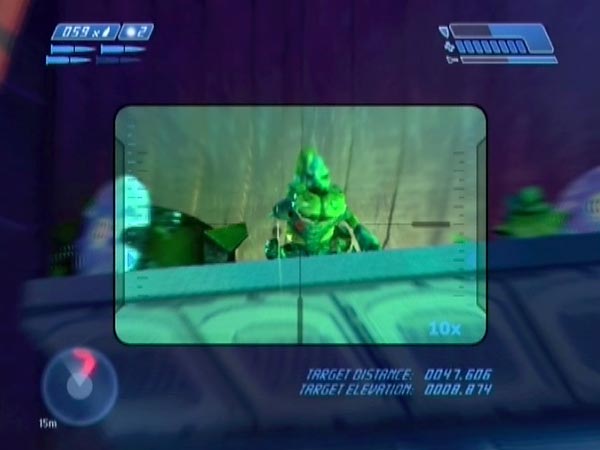
From the spawn trigger zone you can often get a clear and continuing view of the spawning area if you wish, because the two closing doors open when covies are sufficiently near them, and the covies tend to hold station when they can see you or when the place is getting crowded. With a sniper rifle you can see the spawning happening quite clearly while the stack isn't too dense, and it's pretty interesting and amusing - as I tried to demonstrate with BCM146.
You'll routinely see columns of Jackals three or four high. A new Jackal will often displace an old one, bumping him up to the top (potentially passing through a Jackal previously above). Grunts normally spawn a bit further back than Jackals, which explains why large stacks have such an overwhelmingly grunty core. However, sometimes you might see a Grunt appear quite a way out, high up in the air, then fall to the ground - sometimes even outside the spawning area.
You'd probably need to be on Easy to really be able to enjoy watching though, because otherwise you'll be under too much fire to maintain a zoomed view for long - quite apart from the hazard to your health. Even on Easy you'll likely be under fire and have to re-zoom occasionally, but at least the covies have lousy aim. It's best if the only covie firing on you is an orange Grunt, as those are the least bothersome. You can potentially arrange that by repeatedly killing any other attackers. A dead Grunt's pointy backpack can give you some useful partial cover if you crouch, but personally I find it a pain to maintain a crouch for a long time, so I prefer to stand. Besides which, I think the view is slightly better.
Checkpointing afterwards
When you think you've got enough critters, you can get a checkpoint to save, allowing you to repeatedly play around with them. There are two options, giving different horde behaviour.
Muster bay checkpoint (horde advances)
The standard option (seen used in BCM145) is to go up the rise to trigger the muster bay, getting what I'll call the muster bay checkpoint. As well as ending any possibility of further spawning in the passage, the trigger causes a behavioural change, giving your covies an instinct to head for the upper level of the muster bay (and likewise any earlier covies if you happened to leave any alive - e.g. the final pair in the boarding battle). As such, one major activity you can enjoy is to stop them!
Bearing in mind that the closest ones may already be heading your way, you'd better get the checkpoint quite promptly after hitting the trigger line. Don't be exposed to covies in the room or the checkpoint will get delayed by enemy threat and you might not get it in time before your horde starts attacking. Actually though, there's a sub-option here. You can deliberately delay the checkpoint (initially with jumping), enter the muster bay, fall to the ground, open the big door and head away (jumping) to get the checkpoint in the boarding room (or wherever), so you'll be on the other side of your horde.
Door release checkpoint (standoff continues)
The other checkpoint option is much less convenient to get but results in a more flexible save. At the end of the main part of the boarding battle, big doors slide apart to reveal either two Hunters (Heroic and Legendary) or two Jackals. Killing them or reaching the slope triggers the opening of the passage network, and also triggers what I'll call the door release checkpoint. But by using a combination of jumping and enemy threat you can keep it delayed until after building your horde. With this option your covies won't yet have an instinct for heading to the muster bay (you could always change that later of course), so they'll be fairly static, which might be preferable with certain activities (mischief or whatever). Also, further spawning remains possible.
Tips: To save you doing jumping manually while spawning continues, you could rig something with your controller so the jump button stays down, causing continuous jumping and freeing you to leave things unattended. A fairly easy way is to rest some weight on the button. Just enough to keep it down, which shouldn't cause any damage. On Easy, an alternative way of keeping the delay going is to mainly use enemy threat, by standing exposed in the spawn trigger zone. That would save you doing jumping. You might occasionally need to move out of sight to recharge, but if the only covie taking potshots at you is a Grunt (which you can probably arrange by killing any aggressive Jackals), you might not even need to do that.
Horde evolution and numbers
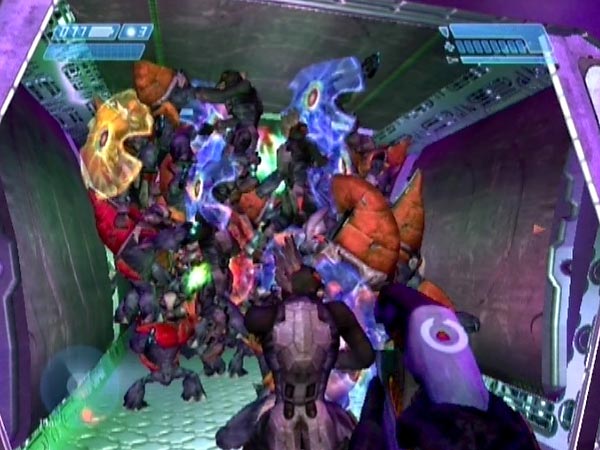
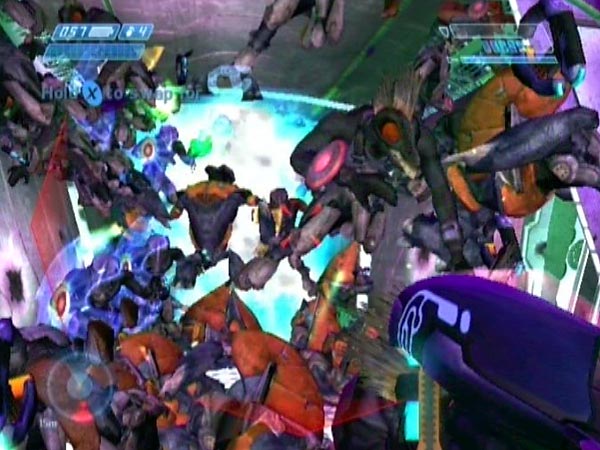
In the early stages of horde growth as spawning continues, a fair number of covies will advance to collect in the side-passage (the one nearest you) or close to it, and eventually you'll probably end up with ten to twenty, or something like that. You might think the main passage would then start filling up, but actually things don't work like that. It tends to remain quite sparsely populated, but those troops are still enough to form a bit of a traffic jam, stopping further troops from advancing.
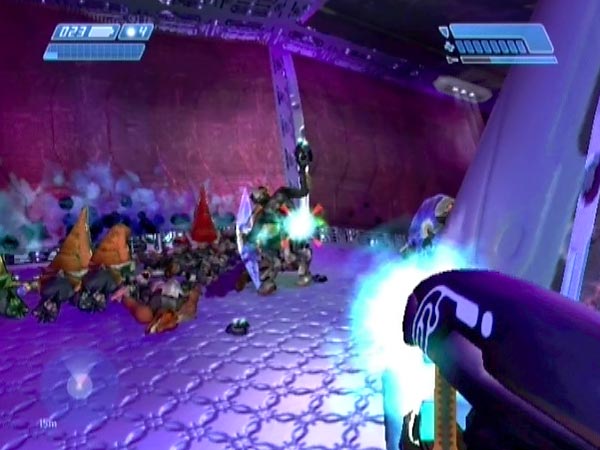
Back at the spawning area however, congestion is very much the norm, as covies quickly start stacking up on top of one another. Initially this could be because they're too slow to extricate themselves and go along the passage, but once the passage gets populated, that impedes them from even trying to move, and so things quickly snowball. In due course you can expect them to reach all the way up to the ceiling in a densely packed mass comprising well over half the horde. Indeed, once the passage is populated, impeding any advance, the stack will become a greater and greater proportion of the horde as spawning continues. Multiple covies can end up pretty much above the ceiling with feet sticking through, or behind the grills along the side of the ceiling, or embedded in the walls. 'Exernals' I call them, because they're not properly within the level. You can see plenty of examples in BCM152, in which I have some fun with them.
I'm not sure if the externals spawned there or if they got displaced there by new spawnees - it may be a mix of both - but they can potentially lose their footing and fall to their deaths in the void outside the level. It's also possible for new spawnees to spawn outside the walls, falling to their deaths immediately. In BCM146 for example, some of the five Grunt fallers can clearly be identified as having spawned outside (from a frame-by-frame examination) because you can recognize their spawning arms-out posture from an arm sticking through a wall.
Such attrition might eventually cause significant slowing of horde growth, though it's hard to be sure. For a while I though it might even be the limiting factor when it comes to building numbers, but I now think the limiting factor is that the game will simply become too overloaded to allow a new spawning. I say that because you can eventually get to a point where the game is most definitely getting overloaded.
Incidentally, a ceiling guy can potentially be brought down into the passage by shooting him on any part which is showing. When he flinches he might fall through, as seen near the end of BCM144. Another way is to make him jump in surprise, though it's also possible that he'll end up falling into the outer void, same as with shooting (basically they're losing their footing). Sometimes they come down unassisted, something you can anticipate if you see feet sticking through further than usual. As for covies in the walls, they're definitely living on borrowed time. They very easily fall into the void and I've never yet got one into the passage. Sometimes they're able to shoot at you.
Going to the extreme
Early on, I thought I was doing well when I got 105 covies, comprised of 70 Grunts and 35 Jackals. But later I got 115 spawned in just over an hour, comprising 62 Grunts and a whopping 53 Jackals. When I was doing the counting for that, those Jackals seemed to just keep on coming!
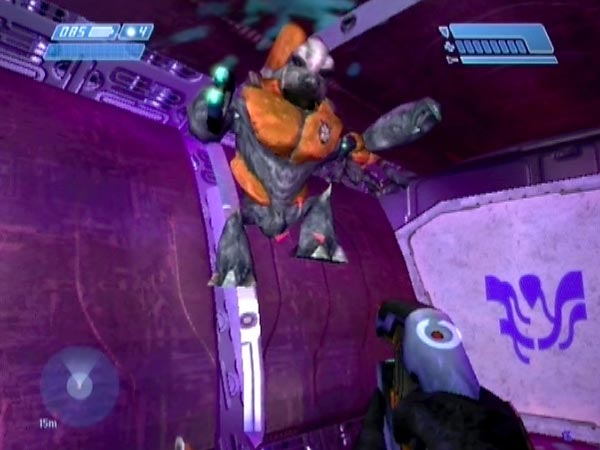
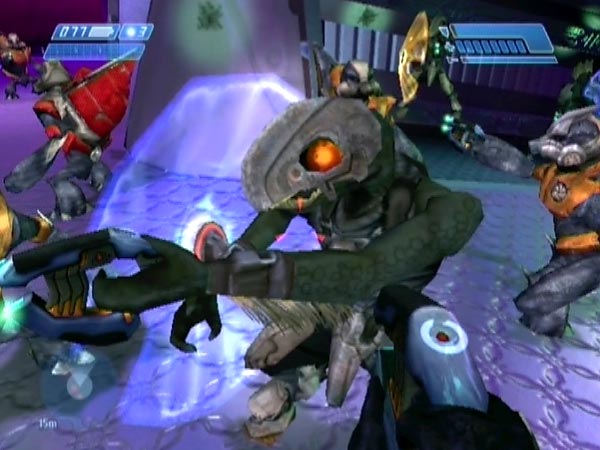
Trying for yet more covies, I got 125 spawned in a little over 76 minutes, and noticed that one of the Grunts (see pic) had no weapon but acted like he had a fuel rod cannon - complete with clanking sounds when he moved around. Quite a funny fellow.
That suggested the game was really getting to the limit. It seemed clear evidence of overloading (didn't want to issue plasma pistols any more!), and I think this was confirmed when I took things even further, letting spawning run for two hours. I counted 131 covies - just a handful more than the 125 - and the game was so strained that when I tried firing a weapon, it didn't shoot anything! The covies couldn't shoot me either. Grenading was likewise a no-go; I could make a throwing motion but nothing was thrown. I needed to melee a covie and let the body get removed, before firing and grenading returned to normal. So I think 131 must be very close to the limit. I also got another fuel rod joker, who now stars in BCM158. You can see my horde of 131 in BCM151, along with the Jackal-heavy horde of 115 I mentioned.
Waiting guide
If you want to aim for a particular average number of covies, how long should you let spawning last? Here's a guide based on my testing. On PAL Xbox, for an average of 20 use 8 minutes, for 40 use use 17 minutes, for 60 use 26 minutes, for 80 use 36 minutes, for 100 use 48 minutes, for 120 use 66 minutes, and for 130 (close to the limit I think) use 100 minutes. With NTSC/PC I think the horde grows about 20% faster, so I suggest multiplying those times by 0.83.
Of course, if you happen to get an unusually large proportion of Jackal waves, your covie total could be well below average, as a Jackal wave only contributes 1, compared to 2 for Grunt waves. Conversely, a bias toward Grunt waves could take you well above the average.
Counting your horde
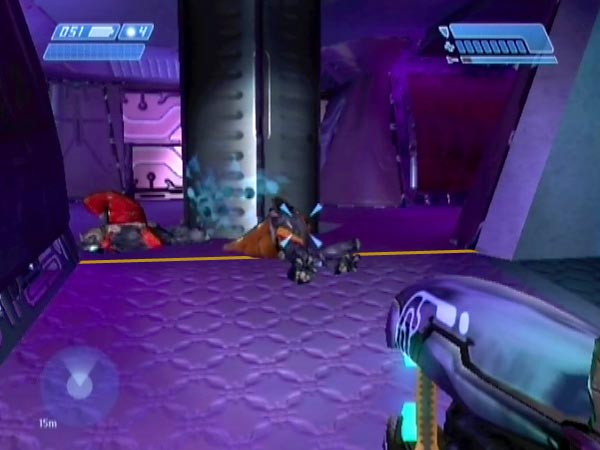
If you want to count how many Grunts and Jackals you've got when you're finished, and assuming you've triggered the muster bay, one thing you can do is keep going into to the side-passage up the rise to let a batch go past - or you can kill them of course (see pic). But you'll repeatedly have to emerge to prompt more into moving. Initially you tend to get mostly Jackals (one time I had 25 before a Grunt turned up!), then eventually a mass of Grunts.
Another tactic is to kill them as they come around the spawn trigger corner, or not long after. The sniper rifle is great for that, and it's fun, but plasma weapons are good too. Try to make sure no Grunt throws a plasma grenade though (don't give him time), else it might set off a chain reaction which could kill a load of covies, wrecking your count.
Another idea is to move to a position just out of sight around that corner to whack covies as they come around - especially Grunts. That can work nicely on Normal or Easy, and the counting progresses faster like that. Try not to provoke fire though, else some covies could die from friendly fire and you might fail to count them.
When there are relatively few covies left, you can get an angle down the long passage to take down targets with a sniper rifle as they head along, though there's a danger of causing friendly fire there.
Let me say, it's very easy to make a mistake when counting, especially if you're counting Grunts and Jackals separately. But even if you're very careful, bear in mind that as the dense pack at the spawning area gradually unjumbles itself, covies not properly in the passage can sometimes lose their footing and fall into the void; and unless you hear the cry, you'd never know about it - so your count could be short. In addition there could be deaths from friendly fire which you don't pick up (the covies sometimes fire even when they don't have a line of sight to you - as if they're getting twitchy or something). So the bottom line is, you really need to count your horde carefully at least twice, before you can be confident of the count.
Drawbacks with high numbers
There are some potential drawbacks associated with high numbers, which I'll talk about here. I may expand on this later with more specific info when I've had more experience.
Framerate slowdown
The biggest issue is that as numbers build, framerate slowdown becomes noticeable, and eventually it can be severe. Obviously that can impact any fun you want to have, and in particular, combat isn't very enjoyable when slowdown is severe. It's like everything is in slow-motion and the game is lethargic to respond to your controller actions. So for combat especially, you may want to stay clear of really high numbers.
Enemy blindness
Something you can commonly experience with high numbers is initial widespread enemy blindness to your presence. There might be a few who see you, but most are oblivious; and then as time goes by, more and more of them see you and hence attack. Based on my experience so far, it seems like hordes of 70+ are subject to this anomaly, but there's also some chance of getting it with slightly lower numbers. For example I've had it with a horde of only 63.
Enemy blindness is good for letting you get among them without cloaking, but it's certainly not good for serious combat. There are ways of preventing it however, if you wish.
In set-ups where you've triggered the muster bay and the horde initially advances if you merely wait on the rise, one way of preventing enemy blindness is to hang back from the lower slope of the rise until they come around the corner. If you instead wish to advance without delay, an alternative prevention method is to do a spot of advance shooting before covies come into view, as if to alert them. Shooting after you're at the corner doesn't seem to work.
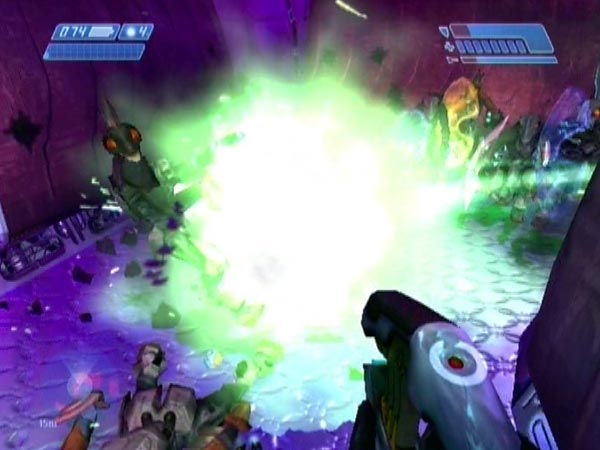
Limited blast effect
Grenade blasts can be limited in how many things they affect. Some covies in the blast radius may not be hurt, and likewise loose grenades may not detonate when they really should've. This is rather noticeable when dealing with a suitably large stack at the spawning area (something over 60 perhaps, though I've not done any systematic testing yet). Throw a grenade in, and plenty of covies may survive, whereas there really should've been a complete wipeout and possibly a colossal chain-reaction. It's as if the game is unable to handle all the consequences of the grenade blast, because there are just too many things that should be affected.
Dodgy lighting at the stack
With a big stack of critters in the spawning area, you might find that some of the lighting goes off when you try to get close. That can be quite frustrating. It potentially clears up as covies depart; perhaps Jackals especially (their shields may be a significant factor).
Horde removal
Yikes! Just before posting this article, I had a spot of trouble when playing a save with 104 covies. After backing off from the first Jackal to watch him pass to the muster bay, I found that the rest of my horde had vanished! Apparently the game decided it had had enough. I'm not yet sure how much of a danger this is, but I remember that I had the same issue with building a mass of spores in The Library; see Getting extreme. Update: with very high numbers, there's a danger that when you trigger the muster bay to get a checkpoint, the game will remove your horde! This happened to me once when I let spawning run for 90 minutes. However, usually it hasn't happened.
Passage battle
As far as using your horde for combat goes, the obvious idea is to fight them while they're in the passage network. This activity comes in two variations: standard or static, depending on whether they're heading for the muster bay or not. Remember, checkpoint options allow you to have things either way. In the standard case where they're on the move, stopping any from reaching their destination could obviously be part of the challenge.
Aside from a straightforward frontal attack, you could attack from the side using any of the three side-passages, but particularly the one up the rise. Ambushing them at the spawn trigger corner is another idea. You can have a lot of fun there, e.g. whacking them one after another. All in all, there's quite a bit of variation available.
In regard to difficulty levels, I'd suggest using Normal or Easy if you fancy a gung-ho approach, wading into the horde. With Heroic or Legendary you'll need to be much more careful about exposing yourself.
Weapon provision
To make things most flexible, it would be nice to have an array of weapons to choose from at the start of your save. Here are my thoughts on arranging that, though I may update this when I've done more play.
For starters, make sure you brought the sniper rifle aboard, still unused. You'll have a whopping 68 rounds, and with so many enemies you can sure put them to good use! During the boarding battle you could spend some time gathering weapons, or at least handling them to make sure the game won't remove them. Later when you've succeeded in getting standoff mode, you can move weapons to where you want them, killing any spawnees that pose a danger. Additional weapon sources are the few covies you kill up the rise. Then you can get let things proceed as usual.
Note: On Heroic and Legendary, none of the covies in the boarding battle have plasma rifles. So if you want one for the passage battle, you'll either need to've brought one aboard with you, or get one from an Elite in the passage network later.
Horde size recommendations
With high covie numbers the framerate slowdown can make combat too unenjoyable. The exact feel depends on weapon choice and how you're fighting, but with around 80 I certainly find the slowdown too bad, and in particular the plasma pistol is sluggish. For reasonably fluid combat I'd suggest not exceeding 70 covies; and if you want to use a plasma pistol a lot, make that 60.
Muster bay battle
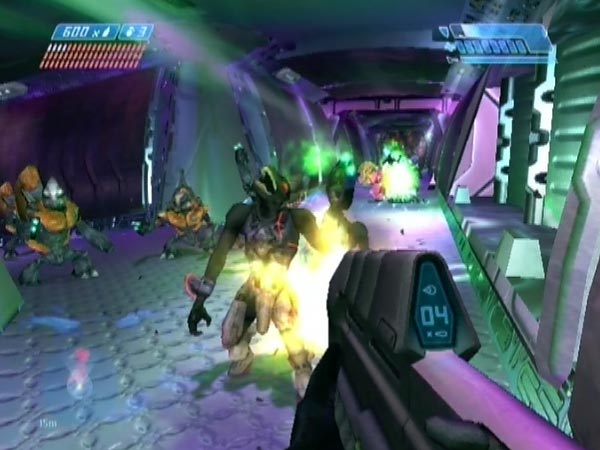
By triggering the muster bay you can give your horde an instinct to head for its upper level. It's quite a job actually getting them there however, because things get rather congested along the route and also in the room itself, and you'll keep having to try and clear things up, plus you generally need to get quite close for them to move along at all.
Some may end up getting killed by friendly fire in the process, and you have to watch out for your own health too of course, but with effort and patience you stand a chance of at least getting the majority there, resulting in a very crowded upper level. Crucially, it's also possible to get a checkpoint afterwards to serve as a battle start checkpoint (there are a couple of options), and then you're set for plenty of fun, attacking from either of the two entrances or from down below (e.g. with a sniper rifle and throwing grenades).
I'll expand on all this later when I've explored it more fully and have an accompanying movie to show, but for now I just wanted to point out the potential.
Note: In case you were wondering, I don't think there's any way to make your horde collect on the ground floor. Actually, if a covie falls down to it, he'll head back up. I've seen a few Jackals do that, and also a bunch of Grunts when I threw a grenade.
Further remarks
As I said in the introduction, this trick opens the door to a whole heap of new fun. I'm just getting into that, and you can surely expect to see a bunch of movies over the coming weeks or months. I also expect to expand the article, especially in connection with the combat sections, but also I may have a few new sections to add, concerning other types of fun.
Almost missed it!
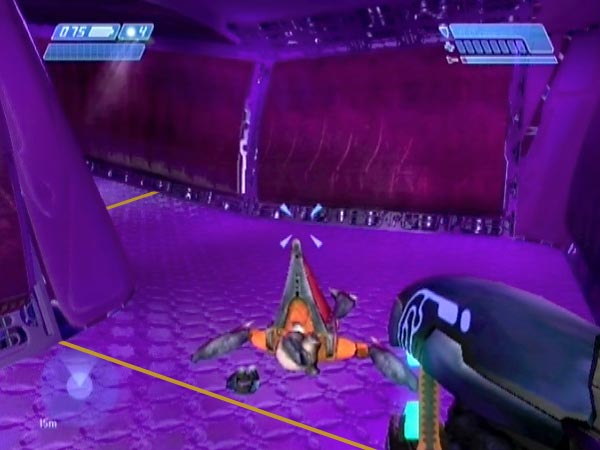
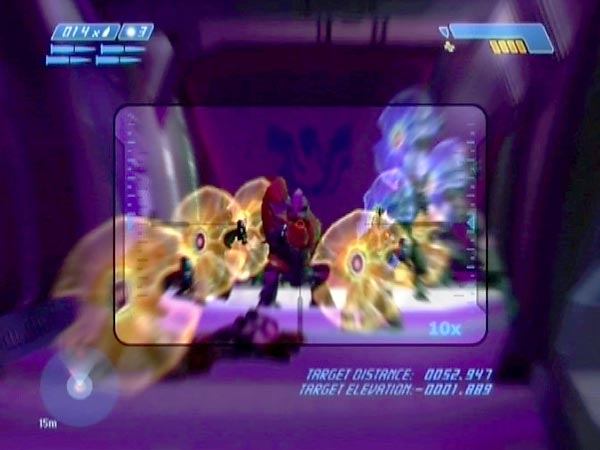
I almost missed this accumulation business. While fiddling around in this part of the level on Legendary, I pinned down the spawning trigger zone and realized that the spawning went on and on, but I thought the game was only allowing a new spawn when the total of previous guys fell below 2, or something like that; so numbers could never build up. Fortunately though, I took the trouble of doing some testing to be sure of the detail. By chance I happened to get standoff mode, and in due course saw that the covies were accumulating - and realized I was onto something good.
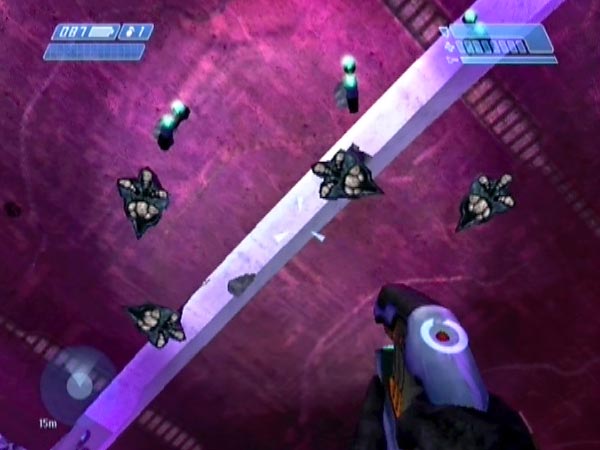
The picture here shows the view down the passage, shortly before I went off and got the muster bay checkpoint so I could start checking out my unexpected collection (there were also some covies in the side-passage by then). Incidentally, in this play the first nine waves were Jackal waves. Nine Jackals in a row!
Doing without standoff mode
In my description of the trick I said attack mode was no good, but let me qualify that. On Easy or Normal it's viable to build a small crowd by repeatedly triggering a spawn then doing some evasion to maintain your health. But as numbers grow it'll get harder and harder of course, and the covies will increasingly lose personnel from friendly fire, eventually making continuation pointless even if you're managing to stay alive. You might like to try it for fun, but don't expect to manage more than a dozen or so.