Setting up
Associated movies
Difficulty levels
A brief word about difficulty levels. On Heroic, my usual difficulty level for the battle, you can potentially face 34 covies. On Legendary you get 5 extra Elites, whilst on Normal or Easy you get 5 extra non-Elites. Whatever difficulty level you choose though, the intensity means that things will feel a lot tougher than what you'd normally expect at that level, so watch out! Legendary tends to be too severe, especially for the Marines, though it can be viable with certain tactics such as allowing yourself good chain-gun support or the use of a sniper rifle. So even if you normally play the game on Legendary, I'd recommend using Heroic or lower, at least to begin with.
Simple routine
To briefly outline the situation, the battle takes place in the rockslide area, where 7 Marines are sheltering in a maze of huge rocks plus two plateaus. As well as an armoured sniper, the squad will include either Stacker or Johnson, at random. The sergeant may be armoured, but it's random and uncommon (looks like a 1 in 4 chance, based on my testing). Overall, probably one or two of the non-sniper guys will be armoured.
There are some covies there initially, and reinforcements arrive later in a succession of four covie dropships. But the great thing about this situation is that you don't need to whittle down the enemy count to trigger each successive ship. Once the first ship is triggered, you can just wait and let the enemy numbers build! That's the dynamic behind setting up the megabattle, and it's very fortunate that Bungie scripted things like that, unlike the dynamic in the first Marine encounter of the level. Basically, each successive ship is on a time limit until it's forced to spawn. Presumably that was done as a way of pressuring the player to take some aggressive action.
In this section I'll describe a simple routine for setting things up (definitely the way to start if you're new to this), as shown in my tutorial BCM648 which is done on Heroic. You'll probably lose a few Marines and covies due to some initial clashing, but hopefully it won't be many. In fact, on Heroic there's actually a decent chance that you'll end up with the maximum 34 covies, though some may've lost health.
Before entering
Before even entering the rockslide area, it's good to save a checkpoint so you'll be able to retry the set-up work if desired. That's just because things might not turn out as well as you'd like. The natural checkpoint to save is the one at the lifeboat, after having driven up the valley.
Leaving passengers behind (I'll assume you've got some, though you of course don't need to), head for the rockslide area with a sniper rifle. There was one at the lifeboat. Use the entrance which is out in the valley, i.e. the right entrance, not the left entrance near a big waterfall.
In the rockslide area
When you enter, there may or may not be some fighting underway. But from the point of view of maximizing covie and Marine numbers in your eventual set-up, it's certainly best if things are initially quiet, because the less fighting that occurs, the better.
Quickly snipe the sniper up on the Marine plateau. Well, you don't have to, but otherwise he's liable to kill a good few covies even before the set-up is finished, and may also do a lot of killing later in the battles, all of which means less fun for you - plus it's annoying when he steals your kills or shoots you in the back! These are the main reasons why I recommend eliminating him, but also you'll potentially be able to grab his dropped rifle on the plateau later, and if you're lucky he'll also leave you a spare frag or two!
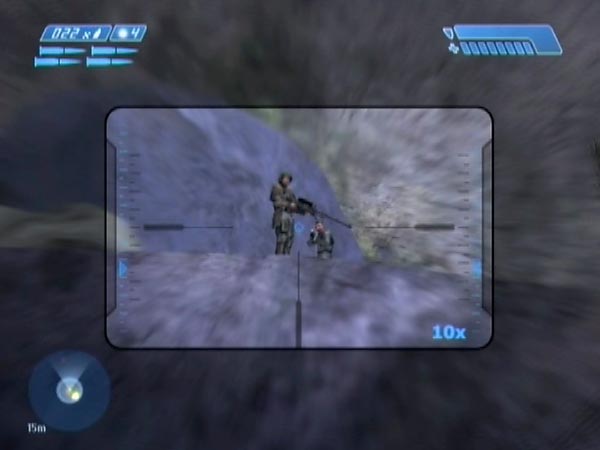
Reboard the hog and enter the dropship trigger zone. This is a large area within the rockslide and part of it is illustrated in the accompanying picture, as best I could determine. Entering it will get the flood of dropships going in due course, after a delay. Then immediately head back out into the valley.
Waiting
Get prepared for battle with passengers back aboard, and wait for the four dropships. A nice waiting spot is up on the big mound not far from the entrance, partly because you'll be able to see all the ships from there.
The way you've done things, the first ship will turn up almost two minutes after you triggered them. Then the rest take about five minutes in all (each spawning giving a checkpoint), with shorter and shorter waits in between them. Ship 4 will be the most prominent, coming in from near the direction of the moon about 50 seconds after ship 3.
Finishing off
To finish off, simply head for the rockslide area, getting an entry checkpoint on the way, to act as your battle start checkpoint. You can use either entrance, but I recommend the valley entrance as the default. It gives more driving variety for one thing, and more immediate opportunities for making covies dive out of the way.
As for the exact timing, it depends on what you want. One option is to head in as soon as ship 4 turns up, in which case your battles will feature the ship descending at the start. Or maybe you'd prefer to wait a while so its occupants will be on the ground by the time you arrive. You could even wait until the ship has flown off and despawned, which would reduce the stress on the game a little.
Sometimes you may fail to get an entry checkpoint, due to ongoing fighting causing checkpoint delay. In that case just revert to the dropship 4 checkpoint for another try.
NB: before saving, you'll probably want to do some playing to check how well things have turned out. In particular, maybe you lost more covies or Marines than you're willing to accept. If things aren't as good as you want, you can just retry the set-up work.
Some variations or options
Here are a few variations or options you might like to consider, in regard to the simple routine I described. Because obviously you don't have to do things completely how I said, and how I demonstrated in my tutorial.
Avoiding framerate slowdown
If distant Banshees are flying around during your megabattle, they'll tend to cause some framerate slowdown (if you're on an Xbox that is), degrading your battle experience. Apparently they're adding heavily to the game's workload. To prevent this possibility it's a good idea to first deal with one of the other survivor areas so the Banshees get triggered, and then destroy them. If the rockslide is the first area you tackle, the Banshees won't exist to begin with but they could get triggered part way through your battle, namely when there are no rockslide Marines left, and you might then start getting framerate slowdown.
I didn't feature this option in my tutorial, but that was just to keep it as simple as possible. Personally I'd always get rid of the Banshees in advance; and typically I'd do it by clearing the hillside survivor area (where there's a sniper rifle, and where you can potentially also pick up an armoured Stacker for the chain-gun).
Helping the covies by killing Marines
If you're actually not interested in fighting alongside Marine survivors, you can eliminate most or all of them, which also helps minimize harm to the initial covies (though there's also my refined routine for doing that). After quickly sniping the sniper as usual, start sniping the Marines below the plateau as you catch glimpses of them through a gap in the rocks (see pic). There's no need to kill non-sniper Marines on the plateau though; they seem to be no threat to the enemy as they don't go near the edge, and in any case there are benefits to maintaining a survivor.
Bear in mind that if you kill multiple Marines you may become a traitor, though you can always wait to be forgiven. If you want to minimize that risk, I suggest killing only one or two and just winging others, letting the covies finish the job. If you overcook things and become a traitor, which you can check by seeing if your reticle goes red over a Marine, you could either revert to try again, or just wait to be forgiven.
If you want the covies to take no damage at all, here's how to do it. When you enter, it's essential that they haven't noticed the Marines yet. Kill the sniper, then briefly advance to get the enemy's attention, and draw them your way. Back off just far enough to be safe (see pic).
You can now snipe most or all of the Marines below the plateau at leisure though a gap in the rocks, though you may have to move along the right towards the lifeboat a bit to get a view of one or two others. In using this method you'll surely become a traitor, so you'll have to wait a while to be forgiven. Go have a cup of tea or something.
Helping the Marines by killing covies
If you want to try and minimize losses to the Marines at the base of the Marine plateau, an obvious thing you can do is snipe some covies quick, with the aim of stopping them even getting into the rocks (so, target the ones nearest the rocks first). Sometimes they're initially just standing around (see pic), not having spotted the Marines yet, which is ideal. Sniping the Elite (or Elites) is liable to panic nearby Grunts, which should help.
With luck, maybe the Marines will escape unmolested, giving you a nice big squad to fight alongside, up on the plateau. However, there's also my refined routine for doing that (it's harder though).
Note: when it comes to thinning out the initial covies, bear in mind that the enemy count can affect how soon the first dropship turns up after you enter the trigger zone. It seems to appear after just a few seconds if the count is below 3 or subsequently falls below 3. Otherwise it's liable to take either 1 minute, or nearly 2 if, as usual, you vacate out into the valley.
Fighting to music
If you want to be fighting to rousing music, deal with both of the other survivor areas first. Just as the final dropship is heading in, the game should start its climactic music as this will be the final conflict of the level. It's great music (lasting about 6 minutes), but personally I prefer to do without, mostly to increase the realism but also so I can hear everything better. Besides, I'll often be playing for an hour or more, which is a long time to be hearing the same music over and over!
Refined routine
With the simple routine described earlier, you'll often lose some personnel due to the initial covies finding the Marines below the Marine plateau and having a scuffle. But with the 'refined routine' I describe here, which I didn't come up with until 2009, you can actually keep those groups apart, at least initially, hopefully leading to a set-up which has maximum covies and 6 Marines (we're still eliminating the sniper), and with everyone healthy because there's been no fighting between covies and Marines.
It's what I'd normally use nowadays, at least if I want all those Marines. It's a bit tricky and can take a fair bit of perseverance though, because the game arranged things so the covies and Marines would likely soon tangle (those Grunts do like to nose around the rocks), and you're having to work against that.
You can see the routine demonstrated in my tutorial BCM653 which is done on Heroic, my usual difficulty level for the battle. The work would be significantly harder on Legendary, and I'm not sure I've ever tried it yet. Wouldn't be looking forward to it!
The method
As before, you should save a checkpoint somewhere before heading into the rockslide area. There's a good chance you'll need to return to this checkpoint multiple times, getting personnel freshly spawned each time. Spawning occurs some way past the blue entry lights, and shortly before the entry checkpoint trigger. The result is random, and not always something you can work with.
Drive in alone, with sniper rifle ready. If covies are already heading into the rockslide or there's any fighting going on, that's no good. Eject the disc and reload to get back to your your saved checkpoint for another try, with fresh spawning.
If things are quiet though, you're in with a chance of success, though if something goes badly (e.g. if fighting breaks out despite your efforts, or if you accidentally splatter a covie) you can always revert to the entry checkpoint for another go, if you think there's still the potential for success with this particular spawning. I often find myself doing that multiple times, and getting better at the work due to growing familiarity with the specific situation.
Quickly snipe the sniper (see first pic here), then try to get the covies' attention quick, either by reboarding the hog and advancing, or by maybe firing a few shots if you think it's a good idea (it might stop a nearby Grunt from heading into the rockslide) and perhaps even advancing on foot a little. If you do advance on foot, back off as the covies come your way, and then reboard the hog.
Now you've got their attention, draw them away from the rockslide as far as you can. They seem relatively willing to be drawn to the lifeboat corner used by dropship 4, so drive over that way, making yourself an inviting target, and maybe back off into the corner as they get closer.
If you need to recharge your shield at any point, which is especially likely if you're contending with a red Elite (ouch!), you can temporarily shelter behind your hog. However, preferably keep sticking your head out so the covies see you, else they can quickly lose interest and might start drifting back to the rockslide again.
Note: things can be a real pain if you're up against a red Elite shooting plasma at you like there's no tomorrow. A blue would be much easier to live with, and for this reason you may like to keep getting fresh spawnings until you do get a blue. But at least it won't matter if you take damage, as you can later use a medkit from the lifeboat in the valley (or from another survivor area).
When the covies seem to be drawn well away from the rockslide, quickly whizz past them to enter the dropship trigger zone, then drive back to briefly distract the covies away again. Once that's done, quickly leave.
Once you're out, I think the situation inside remains essentially frozen. So if you left things in a good state (something it's hard to be completely sure of, bearing in mind the pressures you were under), hopefully that's how things will remain, at least until you're heading back in and personnel come to life again.
The rest of the set-up work, mostly preparing and waiting, is just as before, except that this time, there's a pretty good chance you'll need to use a medkit - at least if you're using Heroic or Legendary.
Checking how things turned out
After getting your battle start checkpoint, you can do some checking on the state of the Marines, such as seen in my tutorial. If you've got six and they all have full health (which you can tell by picking them up in the hog), that suggests that no fighting occurred between the Marines and covies, so it's likely that you've also got maximum covies and they're all in good health too, though a few Grunts may've lost health from friendly fire during your set-up work. You can count the covies later, something best done using a sniper rifle and pistol, carefully killing them and keeping a tally.
Note: even if you check and do find six Marines with full health, on some plays one of them might get killed or damaged while retreating to the plateau. Speaking specifically about Heroic, it's the non-sniper guy that was on the plateau I believe. He's scripted to run down below, putting himself in danger. So you might not always have six fully healthy Marines when linking up with them. This occasionally happened with the set-up I created in my tutorial. With some set-ups though, maybe the covies will initially be relatively far from the rocks when you get your battle start checkpoint, in which case it might never happen.
Enemy numbers
The covies come in five groups: the initial group and the four dropship groups. Each group comprises one or more Elites with either some Grunts or some Jackals (never a mix). On Heroic the numbers are as follows:
- Initial group: 1 Elite + 8 Grunts
- Ship 1 group: 1 Elite + 4 Jackals
- Ship 2 group: 2 Elites + 5 Grunts
- Ship 3 group: 2 Elites + 5 Grunts
- Ship 4 group: 1 Elite + 5 Jackals
- Total: 7 Elites + 9 Jackals + 18 Grunts = 34
On Legendary each of the five groups has an extra Elite, whilst on Normal and Easy each group has an extra minor. It seems odd that Heroic actually has fewer enemies than Normal, and I can't help wondering if that was just an anomaly Bungie failed to notice.
Reds and blues
The split between red and blue Elites is randomized. On Heroic there's no obvious bias either way and you'll typically get 4 of one type and 3 of the other, but I've also had 5 reds and 2 blues for example. Normal shows some bias towards blues, whilst Easy has a strong bias towards blues. If you're brave enough or fool enough to tackle Legendary, you'll notice a strong bias towards those nasty reds. Yikes! As for weaponry, reds always have plasma rifles but blues sometimes have needlers. Needlers are bad news for your Marines because they're not much good at dodging the needles, and consequently tend to go up with a bang pretty quick if you don't help out.