More set-up tips
- Warthog passengers
- Spare weapons
- Getting good rock geometry
- Topping up a sniper rifle
- Maintaining a survivor
- Eliminating dropship 4 Elites
- Using a base save
Warthog passengers
Here's some discussion of who you might like to take into battle with you.
Sergeant Johnson
Sergeant Johnson is great to have on board the Warthog, due to his excellent comments and strong voicing. He almost makes me want to join the army! But when you get the Warthog earlier in the level, is there any way to make sure you pick him up? Driving over to him doesn't automatically make him jump on board; sometimes he seems to've already decided he's boarding the Pelican.
The easiest way of making sure to get him was suggested to me by fellow cyborg Major Silva. At the end of the fighting around the first structure, block Johnson from leaving by standing on the ramp leading down from the structure. Just stand in the middle of the path so he won't be able to squeeze past. The Pelican will eventually fly off without him, and you can pick him up later. For more detail see Evac prevention at the first structure, which includes tips on how best to keep the Marine survivors healthy.
One drawback to using Johnson is that he's unarmoured, hence not terribly resilient. You could do yourself a favour by at least making sure he's as resilient as possible. On Heroic, check that he can survive 6 AR rounds. If so, that's about as good as you can expect.
Note: Sometimes Johnson has been strangely silent on the chain-gun, which is obviously no good. If I figure out what's up with that, I'll let you know. Or if anyone else figures it out, please let me know!
Sergeant Stacker
I'm also a big fan of Sergeant Stacker, who you'll find among the hilltop survivor group. He's the guy in a cap with a southern drawl and lots of amusing lines, especially when using the chain-gun. You could even have him aboard with Johnson, giving you the most fun-filled twosome available!
But here's an important point. Sometimes he's wearing armour, and sometimes he isn't. Make sure he's armoured, because he'll be far more resilient to enemy fire. To do this, save a checkpoint somewhere prior to approaching either of the entrances to the hillside area, then head in. If Stacker is unarmoured, eject the disc and reload to try again. It's just a matter of luck.
Duplicated sergeants
Bear in mind that the rockslide survivors will randomly contain either a Stacker or Johnson. This is settled at the moment spawning takes place, namely when you trigger the rockslide area by heading along either of the two entry passages. Because of this, you could end up with two Stackers or two Johnsons! Now that's just weird.
If you want to get a particular rockslide sergeant - either because you want a duplicate or you want to avoid having a duplicate - here's a routine you could use. Save a checkpoint somewhere prior to triggering the rockslide area, and copy the save to a memory card. Resume playing, and save a rockslide entry checkpoint. Now whizz over to see which sergeant you've got. If it's the wrong one, eject the disc and copy the memory card save to the Xbox to try the entry procedure again. When you eventually get the right guy, you can eject the disc and reload to get back to your 'good' entry checkpoint, to resume your set-up work from there more carefully.
If you plan to eventually drive in with both a Stacker and a Johnson and you don't want to end up meeting a duplicate at the plateau, just make sure the rockslide sergeant is killed during your set-up work.
Non-sergeant passengers
Aside from the sergeants, there are plenty of other Marines you could choose from as passengers, including personnel from the other two survivor areas. However, I'd recommend using someone with armour as armoured Marines are far more resilient than unarmoured ones.
When you get the hog early in the level it already comes equipped with an armoured Marine, which is handy. But you sometimes get armoured guys in the other two survivor areas as well, if you want to use any of those instead. For advice on safely extracting survivors from those areas, see my page about Extra Marines and hogs.
Spare weapons
Spares outside (easiest option)
You can make a save extra flexible by involving spare weapons. The easiest option there is to form a collection outside the rockslide area, near your intended entrance. That can be done before ever entering the area. When you get the dropship 4 checkpoint (which is fully delayable by the way, so you also have the option of delaying it a while if you want), be standing at your spares and have the hog nearby. Save the checkpoint to finish.
Each time you fancy a session of battling with this save, you'll be able to select weaponry at the start before heading in (getting a checkpoint on the way), giving the session a particular flavour. Actually you could also select who's on the chain-gun. Maybe give the other guy a session on the gun for a change!
The save could also be used as a base save from which to produce 'normal' saves (i.e. checkpointed as you're driving in), featuring various weapon combos and passenger configurations.
Spares inside the battlefield
It's trickier to arrange for spare weapons inside the battlefield, e.g. to give yourself multiple options at a particular defence spot, but it can be done. Here's how.
When you first enter the rockslide area, deal with the initial conflict as desired (either helping out the Marines or covies), but preferably don't enter the dropship trigger zone yet. If you stay outside it, you'll have as much time as you want for moving weapons into position. After that, you can resume the usual set-up work.
But what if you want to move weapons to somewhere inside the dropship trigger zone, such as the Marine plateau?
You should first move them to a holding area just outside the trigger zone, to minimize how far there is left to go. For the plateau I recommend the start of the narrow passage (see pic) just after the top pass, because the trigger zone starts about halfway along that passage. Next get a safety checkpoint at one of the entrances, just in case things go badly and you need to try again.
Now efficiently move the weapons the rest of the way (remember you can move more than one at once) and get clear before any of the new covies approach. It could be handy if you left a hog somewhere just outside the trigger zone, ready for a fast getaway. If you misjudge things and get caught, you can revert for another go.
Obviously you should try to stay clear of any covies while moving weapons into position. If you helped out the initial covies but maintained a survivor, those covies will fortunately have a strong territorial limitation for now, which will keep them well away from the half of the battlefield stretching from the left entrance all the way to the plateau.
NB: it's not really viable to bring in spare weapons if you also want to keep most of the rockslide survivors and initial covies alive. When bringing in spares, those covies would probably spot the survivors, and a fight would break out.
Weapon sources
There are plenty of weapon sources and the hillside survivor area is quite handy. A plasma pistol on 100% can sometimes be obtained from dropship Grunts there, or from dropship Grunts in the first survivor area early in the level.
You can get plasma rifles on 100% from Banshee pilots. You'll get Banshees in the valley after fully dealing with one of the other two survivor areas here; and remember, it's good to do that and destroy the Banshees, so there's no chance of them causing framerate slowdown in the megabattle. To make sure you can locate the plasma rifles easily, take care to destroy each Banshee as it's heading in a particular direction, e.g. so the rifle will get stopped by a cliff wall or something.
Another close source is the lifeboat out in the valley. There's also the lifeboat in the rockslide area itself of course, though you may need to grab stuff fast before nearby covies get you.
Topping up a sniper rifle
I don't normally take a sniper rifle into battle because it would tend to make things too easy, but if you do want to start off with one, you'll ideally want a full one of course. There are no ammo cases lying around, but there are four rifles available, so topping up with ammo shouldn't be any problem.
Assuming you used the one from the valley lifeboat in your set-up work, that would still leave two in the rockslide area (including one held by a sniper, who you may've killed), and one in the hillside survivor area.
You could top up from the rockslide ones before departing (if you don't mind dawdling), but you'll probably prefer to leave those rifles intact for possible use in the megabattle itself. That leaves the one in the hillside survivor area, which is always the one I go for. On Heroic or Legendary the rifle's owner has already met a nasty end and lies slumped against a rock. On Normal or Easy however, the owner is still alive so you'll have to kill him if you want the rifle.
Getting good rock geometry
Oddly, a rock can vary significantly in size and shape in different set-ups. This can be very relevant for certain battle tactics which would involve that rock, so you may be interested in getting particular rock geometry. The loading point at which the rock geometry gets randomized is shortly before you reach the surface after crossing the light-bridge, and the preceding checkpoint is the one you get after the light-bridge. For advice on how to get the geometry you want, see Rock geometry in the general 'Engineering tips' section. I'd normally use the 'copy restart method' to produce a base save with nice rock geometry. Once I've got that, I'll know that all the saves I produce from it are going to have that geometry.
Central rock on the plateau
A rock of particular interest is the huge 'central rock' up on the Marine plateau, overlooking both approaches. It's nice to have this low enough to be able to clamber on top of when you want, as that's a very enjoyable firing position for trying to repel enemies arriving from the left (see Death from on high, within my 'Plateau front defence' plan). There seem to be five designs for this rock, and I suspect they occur with equal likelihood. Here are my descriptions.
One design is nice and low, very easy to hop up on top of at various places around its perimeter. It has a flattish top convenient for moving around on (perhaps dodging enemy fire), with a slight depression in the middle which offers great cover. It's easily the best design to have. You can even get a hog up there, though I wouldn't do that as a serious tactic.
Another design (see my second pic here) has a sloping side facing the left approach. It's easy to climb but you're rather exposed and the sloping surface isn't as easy to move around on, so I'm not too keen on that.
Then there's a design (see third pic) which is too high to climb but which you can get on top of with a grenade jump fairly reliably, once you've found the best spot and had a bit of practice. Once you're up, the top slopes upwards a little towards the left approach, giving you a nice ridge of cover. That makes it a rather interesting prospect for battle, as long as you can manage to get up quick before the Elites start arriving!
There are also two higher designs. Previously I didn't think there would be any way to get up on those monsters unless by some freaky grenade jump I was unaware of. However, after recently spending time on my lifeboat area defence plan, I've realized something. The five designs for the central rock are exactly the same as for the 'lifeboat rock'. With grenade jumps I was able to get up on the higher two designs at the lifeboat, so I expect you can do the same on the plateau as well, though it's not quite the same because the rock is embedded differently in the ground.
Incidentally, in regard to the latter two rocks pictured here, those are respectively referred to as the 'slope-back' rock and 'jump-spot' rock in my lifeboat area defence article. On the plateau however, that jump-spot is no longer something you can jump up onto from the ground without a grenade boost.
Note: If you're making repeated attempts to get the design you want, bear in mind that it's easy to learn to recognize each design from near the right entrance to the battlefield. This will save you having to drive up to the plateau to check.
Maintaining a survivor
If you attack the Marine survivors to help out the initial covies (as a way of trying to maximize the enemy count for the later megabattling), you may like to keep in mind that there are benefits to keeping at least one survivor alive for now. For one thing, it prevents your HUD showing a distracting indication of the next group of survivors (if any) - something that would happen after a while. However, that might not bother you, and in any case you could get the indication switched off by making contact with that group before continuing the set-up work. A more important benefit is that until dropship 4 arrives, the initial covies will retain a territorial limitation that can keep them out of your way when you're bringing in extra Marines or spare weapons. The dropship 2 troops will also have a useful limitation. So, within the context of helping out the initial covies, how can you try to maintain at least one Marine survivor here?
Heroic and Legendary
On Heroic there's a non-sniper on the plateau. Leave him unharmed. He stays back from the edge and will be safe to begin with. When dropship 1 descends however, he announces "Heads up, I got a Covenant dropship down there" or suchlike, then he runs down to the base of the plateau where he's liable to blunder into any lurking covies - a definite health hazard!
One way of keeping this wandering bozo alive is to make sure the covies are distracted away from the rockslide by the time he's down. A bit of driving about should do it. Try to keep them lured away until the dropship is departing. If he's not spotted and killed, he'll run back up as the ship rises, saying "Come on, let's get outta here" or something like that. Another method is to ferry him onto the neighbouring 'island plateau' before the dropship arrives. That stops him running anywhere, and as long as he's not near the edge he'll be safe from any covies down below.
On Legendary there are two non-snipers on the plateau and you can do much the same thing as for Heroic, keeping one or both alive.
Normal or Easy
On Normal or Easy the sniper seems to be the only survivor on the plateau. That makes things awkward, but here's what I'd do.
After sniping the sniper and maybe another guy, drive in quick (alone) and pick up a survivor, then ferry him onto the island plateau where he should be safe. A drawback to this method is that you'll have entered the dropship trigger zone and won't have much time to bring in Marines or spare weapons from outside before the first dropship arrives. However, you could add more later.
Note: when picking up that survivor, try to do it away from the action so he won't do damage with the chain-gun. I suggest you drive clumsily through the Marines, ideally splattering a few (oops!), then pick one up when close to the short tunnel formed by a slab of rock angled against the plateau.
Don't leave him in a hog
Don't leave your survivor in a hog. If he's in a hog, the game doesn't seem to consider him a remaining survivor. I guess it considers him officially 'saved' - or maybe it's just a programming glitch.
Eliminating dropship 4 Elites
Owing to the odd-out nature of the dropship 4 Elite (or two Elites on Legendary), who namely has an unbreakable territorial restriction that can prevent him taking part in the main battling, you may be interested in eliminating him during your set-up work, at least if you're creating a save intended mainly for battling in places he can't go.
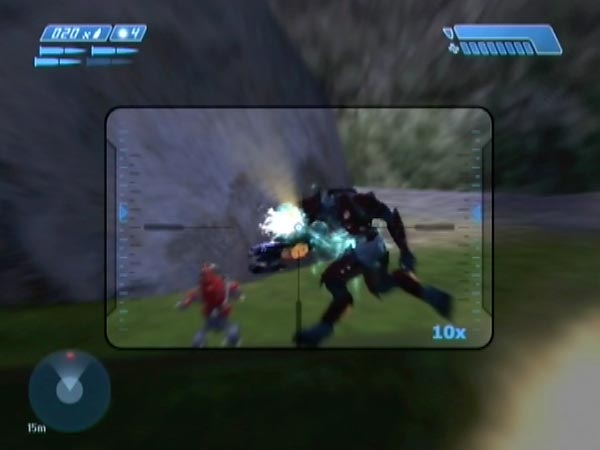
An easy way would be to snipe him from near an entrance as he runs across the battlefield after disembarking (see pic), or after he's stopped running. That'll save you from venturing out into danger, and will also avoid any possibility of damage to other covies.
Pistol work could also do the job fairly safely, bearing in mind that once you land a shot on him, he'll probably stop and face you. Another option would be to drive in and splatter him, though you'd want him to be clear of most other covies to do that reasonably safely.
Whichever way you choose, you'd take care of getting a battle start checkpoint later (perhaps very soon after).
An advantage of having him absent in your battles is that when you've killed all the other troops, you'll get an intercom message, which effectively confirms it; you can be sure that there are no enemies lurking around the corner or anything. You otherwise typically wouldn't know for sure.
Using a base save
Depending on the battle plan you're interested in following, some set-ups will give better combat than others, depending on the pattern of enemy attack and so on, which is partly down to luck. For example, there's a world of difference between a plateau battle in which the enemy arrive in a trickle, compared to one in which they arrive in a nasty great swarm. As such, it'll be worth trying multiple set-ups over time if you want to get the best experiences. When you get a set-up that's giving some great battling, save it for long-term replaying. In this way you can build up a library of high quality megabattle goodness. You can save a lot of time by using a base save to serve as a starting point for creating your megabattles.
Simple base save
For a very simple base save, save at the checkpoint you get after crossing the light-bridge, having made sure to have two perfectly healthy Marines with you, and to be fully loaded with grenades and ammo (I'd recommend a pistol). With this base save you haven't yet gone through the loading point that decides the rock geometry, and as such, it will vary in the megabattles you produce.
Advanced base save
For something more advanced, create a save in which you've tackled at least one of the other two survivor areas off the valley, destroyed the Banshees that got triggered, and gathered an assortment of spare weapons and extra Marines for potential later use. You've yet to head into the rockslide area. Note that although you've passed the loading point where rock geometry gets randomized, there's nothing to stop you going back to re-cross it if you ever want it freshly randomized. However, if you want a base save in which you've already approved the rock geometry you'll be getting (e.g. including a low central rock on the Marine plateau), use the copy restart method to ensure that you'll be getting acceptable geometry.