Low Monitor
Posted July 30th 2013
Associated movies
- Introduction
- Setting up at the third floor's first door
- Setting up at the third floor's second door
- Playing around
Introduction
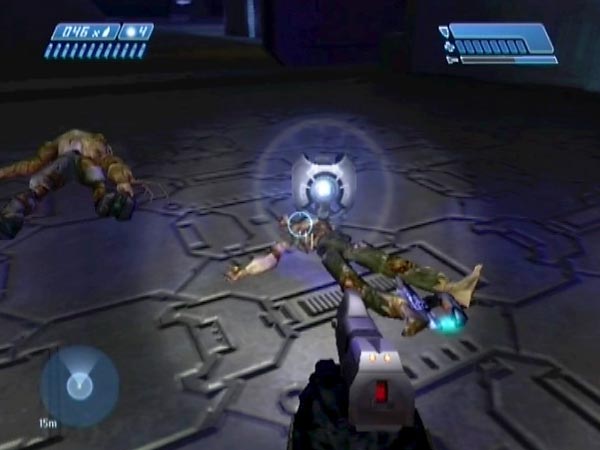
In the course of setting up the two door battle save I used for BCM71, I encountered a striking sight which I couldn't remember seeing before: the Monitor, hovering low down over a Flood body (see pic). That was at the first door on the third floor. By crouching I was able to get a good close look at him, and I recorded footage which later formed BCM72.
From subsequent investigation, it seems that in certain places he can descend to inspect the body of a felled Flood, who could either be dead or pending reanimation. In fact, maybe he's able to do this any time he's hovering stationary and there are no active Flood distracting him (else he'd watch them instead). But even in such a peaceful situation, it appears to be random whether he decides to descend or not, so it's good to have a checkpoint just beforehand so you can repeat your attack work on the Flood until the Monitor decides to come down for a look.
In this article I'll detail two set-ups for causing Monitor descents, and talk about the subsequent fun you can have. My locations are namely at the first two doors on the third floor. There may well be other places you could conveniently set things up too, with similar techniques. I believe any difficulty level can be used; I've used both Heroic and Normal. You could use an easy one to effortlessly speed along to the third floor.
Setting up at the third floor's first door
You can see this set-up work in BCM74. Near the start of the third floor ("But I Don't Want to Ride the Elevator!") there's a tunnel, and once you emerge, the first door is just around a few corners.
As you get near and cross a certain trigger line, a prompt says "Hold your position until the Monitor returns". A few combat Flood spawn at the door, and a bunch of Flood including carriers start spawning around you. Backtrack up the previous alley and kill off the pursuing bunch except for a spore or two - or more if you want. Thanks to your retreat you avoid alerting the door guards, hence they stay put. At this point it's safe to advance again, but stay back from the trigger line. Wait, and dodge your spore company.
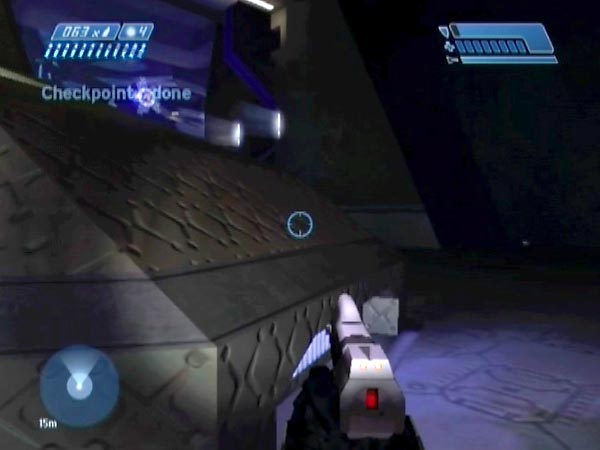
Within a few minutes you get the prompt "Follow the Monitor to the Index". A checkpoint is triggered too, but gets delayed due to spore proximity (as long as you keep them pretty close). Jumping to delay a checkpoint doesn't work in this level, which is why we're using enemy threat instead.
Let the prompt disappear and an additional second elapse. It's now safe to cross the trigger line as no more Flood will spawn. Advance to where you'll be ready to round the corner to attack the door Flood (don't get spotted yet), then get rid of your spore company by using melee or letting them pop on you. With the spore threat gone, the checkpoint is finally granted and you're now set up nicely for causing Monitor descents. But you might also like to have a fully charged flashlight turned on in advance, as it's pretty dark near the door.
Warning: If you go through the door the Monitor will fly off and you'll trigger a new checkpoint, preventing you from being able to revert to your set-up checkpoint. So it might be a good idea to save your set-up checkpoint, in case you inadvertently trigger the door checkpoint.
Alternative working
Instead of using spore death to get the final checkpoint, you could draw them further back then run clear to leave them behind. That way, you'd still have them around to fetch later if you want to watch the descended Monitor tracking them. Then again, if you want some for fetching later, you could just leave some spores behind, while using others to get your delayed checkpoint.
Another variation on the set-up work is to instead have the checkpoint delayed by a combat Flood rendered harmless by getting rid of his weapon and melee arm.
Setting up at the third floor's second door
The advantage of using the second door on the third floor is that the lighting is far brighter there. You can see the set-up work and some fun in BCM219.
In more detail, let's pick things up from when you trigger the approach area. There's a checkpoint, and various Flood appear on top of some large blocks. Also there are Flood on the ground, including carriers. Do some killing to preferably end up with nothing but one or two combat Flood, both on the ground (note: ones on the blocks will jump down if you get close). An advantage to having two would be that in your later fun, you can potentially get to see the Monitor travelling almost horizontally across the ground as he moves from one body to another.
About five metres from the door, there's a parallel trigger line for a checkpoint. Cross it to trigger the checkpoint (e.g. briefly get almost level with the door), then without going through the door, get sufficiently clear of enemy threat that the game gives you the checkpoint. One way of doing that is to circuit the nearest block to make any pursuer lose track of you (though maybe you'll need to use the other block too if it's hard to shake them). You'll then be set up for causing Monitor descents, by attracting your Flood to the door then felling them.
However, there may be a few spores lurking within the left door recess. You can get rid of them before getting the checkpoint if you want (you can attract them out with a shot). That's probably best, because if the Monitor sees them later, it's likely to stop him descending. If you leave them alive initially, you may need to kill them before felling your Flood. If you want spores handy for seeing the Monitor watch them when he's low down, it's better to've some left behind from earlier, or leave a carrier alive.
Note: If you go through the door, the Monitor will fly off (while talking about the installation) but no new checkpoint is immediately triggered; so you'll still be able to revert to your set-up checkpoint.
Playing around
Now a few observations and suggestions in regard to the subsequent fun.
Stopped descent
If the Monitor starts descending and then the target body reanimates (or a different body reanimates), he stops to watch, and won't necessarily resume his descent when you fell the body again. That can cause him to end up at various heights, including head height or thereabouts, something which can give you a rather convenient view. Note also that you can intersect him, and thus potentially be standing with your head inside him!
If he stops due to a body reanimating, he may later head for a different body, even if you've felled the reanimated one again.
Please stop being human!
You can get him to protest by firing at him or using melee. You've probably done that before (firing at least), but this time you can hear him close up. He'll track you for a while, then return to normal. Incidentally, you can even needle him. The needles actually stick into him and you can get needle bangs - as seen in BCM219. If you want to try different weapons on him, you might like to take the time to move relevant spares into handy positions before triggering your play checkpoint.
Grenade play
Plasma grenades just bounce off him, something you may like to test. Frags too. Also, throw a grenade somewhere and he'll look.
Spore tracking
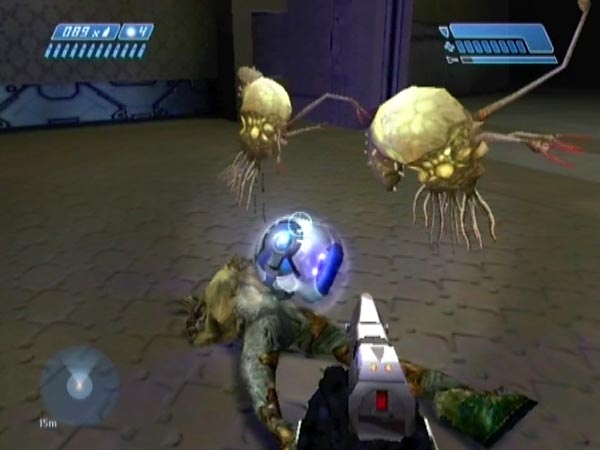
He'll track nearby spores, which can be quite cute to watch as you keep moving around and over him to avoid them. They can pass through him, just like you. You could leave spores somewhere further back, available to draw along to play with when you want. It's probably best not to have them around when you fell Flood though, as I don't think he can descend while distracted by active enemies.
Voice-affected glow
See that bright glow on his front? It varies in brightness as he speaks or sings. You may've noticed it before but now you can get a better look.
Flood body removal
Once he's descended to a body, you can remove it with a grenade or rocket if you want. The Monitor will remain where he is, though he may complain about the blast.
Pulse shedding
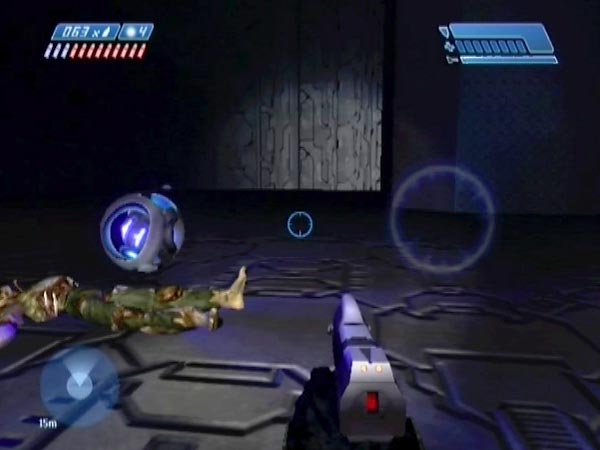
Here's a curiosity. See those expanding pulses of light he gives off? When a pulse begins, it seems to acquire the velocity he had at that time, and it continues independently of him thereafter, rather than having to stay centred on him. If he stops moving just after a pulse begins, you can see it continue on ahead as if being shed.
The effect can be well seen when he's approaching a body at a relatively shallow angle, namely when it's relatively far from him, or if he already got lowish due to heading for another body then stopping. That way the pulse doesn't vanish into the ground too fast. Even better though, he sometimes levels out just before stopping, and if a pulse begins at that time it'll continue across the ground (see pic). Nice to see!
It's also possible to see him leaving a pulse behind, namely when he starts to move towards a body.