Right behind you
Posted March 15th 2011
Associated movies
In this light-hearted application of rearranging, you move a Grunt's Shade through the level and later get him running back a long way, making some nice recreation for Grunt fans!
Setting up
There are many options in setting things up but I'll focus on a specific routine in this section, leaving talk of variations for later.
Move the Shade
The Shade in question is the one near the door below the first bridge. There's no Grunt in it to start with; he won't spawn until you trigger the ground battle. Do a descent trick off the bridge, then fetch a Banshee from the end of the twin bridges area (quite a way off, but you can drive there) and use it to move the Shade through the level. See Shade moving for advice on efficient technique.
Take it across the underground bridge and continue on into the tunnel to get it positioned upright in the middle of the second hump. It doesn't have to be pointing a particular way, but if you want to make it face back the way you came, you can rotate it using a Banshee leg. The whole Shade movement operation can be completed in about seven minutes with good technique, so it's no great hardship.
Resume normal play
Fly back and resume normal play. Don't skip the indoor section after the first bridge, or you won't be able to get two useful checkpoints later. Also don't skip the crashed Pelican area, which is possible by flying high over the trigger area. It seems that enemies must be triggered there, otherwise the Shade Grunt won't have any inclination to run. Your Banshee will be useful for killing enemies and you'll also want one later when you reach the Shade. From the Pelican area onwards, preferably kill all enemies to clear the route for the Grunt's forthcoming run. Also eliminate Marines or they might gun him down prematurely.
After taking care of enemies in the cavern, get a checkpoint low over the bridge (you wouldn't have been able to get this if you'd skipped the indoor section after the first bridge, so it seems). I suggest saving it for safety.
Eject the Grunt
The bridge checkpoint could be taken as the starting point for your fun if you like, but you can go one stage further by getting a checkpoint after ejecting the Grunt from his Shade. He spawned in the turret earlier when you triggered the first ground battle. Here's how to do it (and if things don't turn out well enough, you can eject the disc and reload to restart from the bridge checkpoint if you indeed saved it).
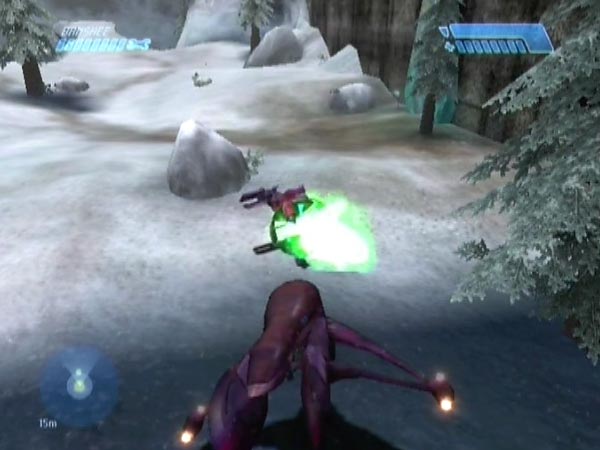
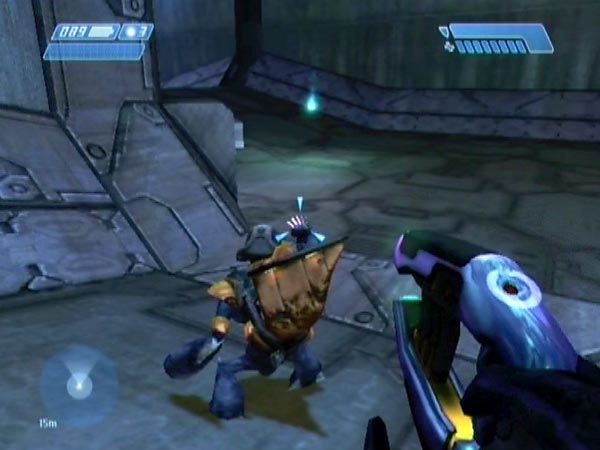
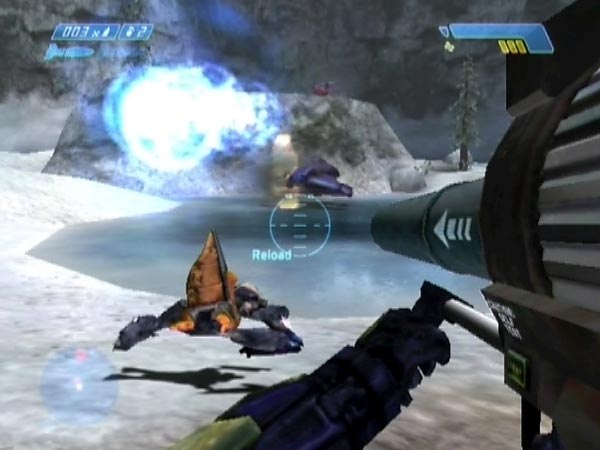
If you're happy for the tunnel music to continue all through your fun, fly to the Shade then blast it over without killing the Grunt, sending him up the tunnel. Obviously the blast mustn't be too close, but if you get it wrong you just had a recent checkpoint to revert to. Make sure the gun is pointing your way when you fire, as it seems to give the Grunt important protection from the blast; he seems to take little or no damage. Quickly dismount, preferably ending up no further than where the Shade was, and stay behind the Banshee so the Grunt loses track of you. I think it's nice if the Banshee is right on the hump or thereabouts, so you can see ahead through the gap, getting a sight of the Grunt (see pic). He can't seem to detect you through that gap, so it's ok - though he can see through underneath the Banshee if it's resting off the ground a bit. Incidentally, if he's alert to you and the Shade lands upright, he's liable to hop back into it!
As long as he doesn't have sight of you and you're not too close, you'll typically get a checkpoint within a few seconds. It's namely the one you triggered just before turning the corner to see the Shade, and it got delayed due to enemy threat (you wouldn't have been able to get it if you'd skipped the indoor section after the first bridge). Sometimes he's slow to start moving or may seem content to remain where he is (maybe he finds the Shade a bit of an obstacle if it's right in front of him), but firing a shot in the air will often get him moving. If you want to make sure you don't get the checkpoint until the Grunt is actually on the move, jump (while remaining hidden) until you see him start to move.
If you'd prefer the music to stop, which will give grunty noises maximum clarity in the subsequent fun, first fly past the loading point at the end of the hump on which the Shade stands. Fractionally past, a checkpoint gets triggered and the music is also triggered to stop shortly. Turn around and come back into the original loading zone, then take care of the ejection and the matter of getting your delayed checkpoint (a different one than before). You can see this way of doing things in BCM31, in which I was keen to give every last snort and clip-clop full clarity.
Having your fun
Now to talk about the fun you can have with your journeying Grunt.
Latching on and following
Once he's on the move you can latch on to follow close, as in "Right behind you!" (audio clip recorded by Captain Spark for HBO's Halo dialogue databank). Try to stay hidden as he comes past the Banshee. You could just pause by the side or circle around it. He tends to be quite observant at the first corner, so be cautious. Having latched on, you can enjoy his amusing running animation with cute clip-clopping sound. It seems questionable that his feet could make that noise, so I figure it actually comes from stereo coconut simulators built into those suit attachers at the base of the back. The coconuts are most likely an idea the Grunts got from 'Monty Python and the Holy Grail', which I believe was very popular on the homeworld.
Be careful not to get too close, because if you touch him he'll be alerted. You also have to keep your flashlight off or he'll realize you're there. His head turns this way and that, to varying degrees, and sometimes he'll spot you even if you've been careful to remain directly behind him. As shown in BCM31 however, it's possible to tail him undetected all the way to his destination, wherever that may be. Makes a nice challenge!
If you're spotted he's liable to face you and start firing, but you can get him running again by being out of his sight for a while. Listen out and watch your motion tracker. He's usually pretty quick to turn and continue on his way. Sometimes he'll briefly do a bit of creeping, suspicious that you might still be around somewhere.
Needle dodging
You can have some fun when spotted. He's only got a needler and you can enjoy dodging around for a while. Actually you can dodge needles all the way to his destination if you like, because he'll back off as he continues to fire. Yep, he may be a grunty idiot, but apparently he's clever enough to negotiate his route backwards!
One particular thing you might like to do is dodge left and right in between needles, in slalom fashion. You can see some of that in BCM32 on Heroic. The key is to be minimal with your sideways movements. It's also a nice challenge on Normal or Easy, but on Legendary it's perhaps too difficult due to the higher rate of fire. I can't recall doing this slalom-style dodging before, but it's quite good fun so I think I'll look out for other opportunities in future. Basically all you need is an isolated Grunt who isn't too close, and preferably who isn't trying to close in on you. This Grunt actually backs off, which makes things a touch easier.
Avoiding or using the tunnel checkpoint
On the second peak in the tunnel after crossing the underground bridge, you'll trigger the tunnel checkpoint. If you remain sufficiently close to the Grunt it'll be delayed by enemy threat, but when you eventually kill him you'll get it within a few seconds unless you keep it delayed manually (e.g. by throwing a grenade or jumping). You might want to keep it delayed so you can still revert to the start of the run for another play.
On the other hand you may want to deliberately get it at some point, so you can subsequently revert to that point (e.g. maybe you're interested in replaying the outdoor section). You can delay it as long as you like, then get it by allowing the Grunt to become sufficiently distant - which isn't far at all.
Throwing grenades past him
Amusingly, when you throw a grenade from right behind him it doesn't automatically alert him to your presence. Apparently he's too dim to make the connection with the cyborg he encountered earlier. Maybe he thinks these things just fall out of the air spontaneously! If the grenade is landing reasonably close he'll shout a grenade alert, which is what I like. Also, if it lands sufficiently near his route he'll divert somewhat - not always enough (he's a grunty idiot don't forget) - and you have to take extra care not to be spotted. Actually I ought to give him a bit more credit, because he does sometimes seem to get alerted to your presence other than by spotting you - particularly near the start of his run.
This all gives rise to an interesting challenge: see how many grenade cries you can get before he reaches his destination. You may be able to pick up extra grenades on the way.
Triggering a panic marathon
If you fire a shot in the air from close behind the Grunt, or maybe if you just shoot him, you stand a chance of sending him into a panic - which also often causes him to change his destination. This seems to be at its most reliable if done no sooner than the penultimate control panel or thereabouts. Earlier than that, he becomes a lot more likely to simply turn around and start hopping about defensively while firing. However, a couple of times I got him panicking even before he'd entered the cavern.
Unless there are colleagues around to give him confidence, his panic usually lasts all the way to his destination even if you don't remain close, so it's quite a panic marathon he goes on! The only exceptions I had were that he occasionally snapped out of his panic when I'd flown off to a distant vantage point. It's fun to just follow behind as in BCM32, but you can also get ahead of him and run backwards (or crouch and watch him pass) so you see him panicking towards you. A case of "Right in front of you", I guess. Or for another idea, fly to some distant place from which to watch, as elaborated in the section on vantage points.
Grunty destination
Based on my experience so far, it seems like the Grunt will already have an intended destination by the time you've tackled the cavern. If you remain undetected while following him, he'll go to the same place and take exactly the same route every time. However, if you interact with him in certain ways during his run, it can cause him to switch destinations. In particular this tends to happen if you panic him when he's out on the snow or not far from it, but it might also happen if he's merely become aware of you at some point.
Very often, the destination is the start of the windy tunnel off to the left when he gets out into the two-Wraith area. There's a particular spot he runs to, and by anticipation it's possible to stay behind him as he stops and rotates left to look back the way he came, as seen in BCM31. The other common destination is the bottom of the dingy path which leads up to the Pelican area. However, I've also seen him go all the way to the Pelican itself. That happened the very first time I followed him, but thus far I've not seen it repeated, so maybe it's rare for some reason. Aside from interacting with him once he's running, I don't know any way to control or affect his destination. Maybe there's something you can do in advance or maybe it's just random. I may try some investigation later to try and get a better picture of how it's working.
Cloaked mischief
As long as you haven't crossed the loading point past the Shade, the active camouflage will still be there when you get out into the two-Wraith area (it gets removed when you cross the loading point). You might like to briefly part company with the Grunt - possibly running on ahead or speeding ahead in a vehicle you left handy - to get cloaked and have some mischief, playing about with him or just watching his behaviour.
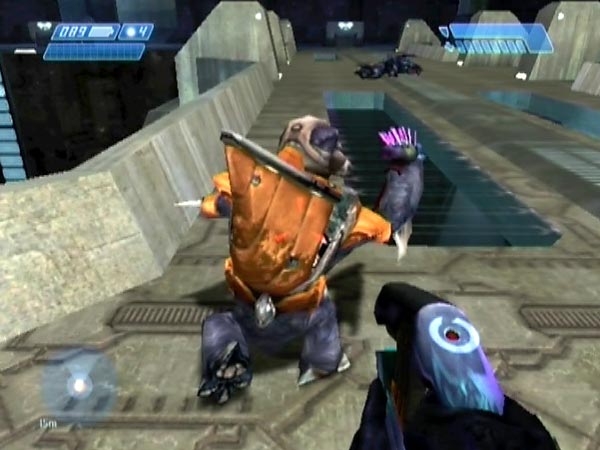
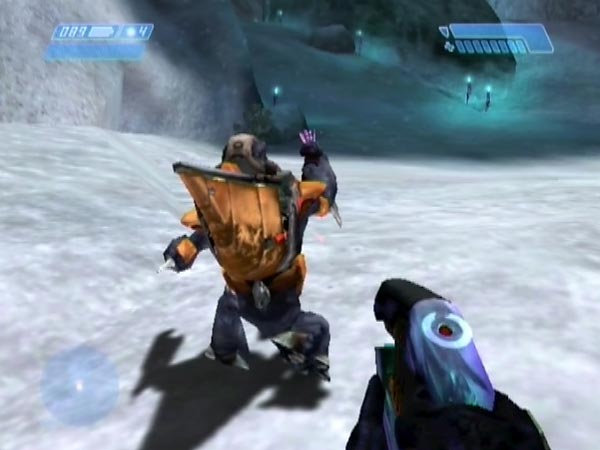
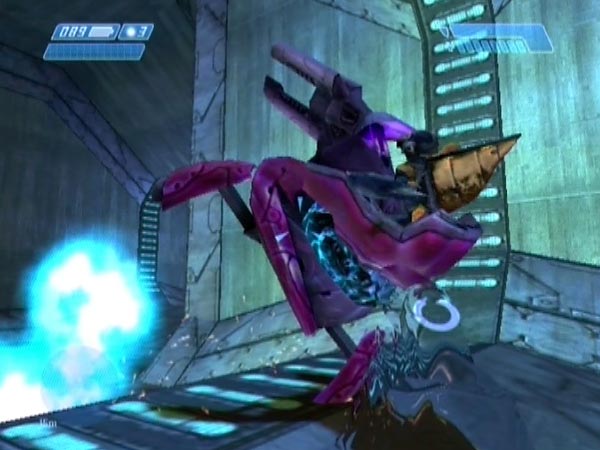
If you brush against him as he's heading for his destination (not in a panic), he tends to go into creeping mode for a few moments, which is amusing to see. You can make him do it again and again. Try crouching to get a good Grunt-level view, as in the picture here.
You can exploit the tunnel checkpoint by delaying it until cloaked and closing in on the Grunt, so you'll be able to mess around with him repeatedly without needing to get cloaked each time.
Taking a vantage point
Once the Grunt gets onto the start of the snow, or just before, you can can speed off in a vehicle - perhaps a spare Banshee you deliberately left there - to reach some vantage point or other. With a Banshee it could be a high vantage point of course. For example, either of the two ledges running around the area (lower or higher), the Banshee platform, or the tunnel entrance roof on which a Wraith hovered. Even if you're far from the Grunt, he'll continue his run - possibly panicking all the way if you gave him a shock before parting company. From your vantage point you can enjoy watching him with a zoomed sniper rifle. It makes a novel sight, especially if he's panicking.
There's also the option of lobbing grenades his way, and let's not forget the rocket launcher! From certain positions you may also be able to see him at his destination, and get him there with grenades or a rocket.
The ideal weapon combo for this activity is obviously a sniper rifle and rocket launcher. Note also that you can exploit the tunnel checkpoint. One way of doing things is to get the checkpoint a short way behind the Grunt, leaving yourself maximum flexibility for how to play things from there. Alternatively you could keep it delayed until driving or flying off, or until you've actually reached a particular vantage point.
Final fun
When he gets to wherever he's going, it can be fun to panic him by firing a shot and maybe chase him around for a while. After that, maybe you could do a spot of Grunt launching. For this reason you might like to be carrying a rocket launcher - or perhaps a needler for a nice mid-air bang in pink! Alternatively, a brisk smack in the face is always amusing. If you do it fast after making him jump in surprise, it'll kill him. You could also enjoy some needle dodging of course. It's possible to lead him to the Pelican area where you'll have plenty of space for it. If there's a Scorpion handy, that gives me another idea. Grunt vs Tank! Perhaps a trifle unfair?
Leaving other personnel alive
All the above is mainly with the idea of having cleared the Grunt's route of enemies and Marines, but there's also some fun to be had by leaving some personnel alive. One thing you can try is to leave lots alive, then try to keep yourself and the Grunt alive while staying pretty close to him all the way to his destination. That's especially tricky if you left the Wraiths in the two-Wraith area operational, not to mention the Ghosts and platform Banshee! Good idea to have a rocket launcher with you I think. Note however that if you cross the loading point past the Shade, any Ghost pilots will lose their normal AI, which won't be much good. They'll just drive into a wall or whatever. The other enemies seem ok though.
Talking of the platform Banshee, it's fun to lead it into the windy tunnel if the Grunt has gone there. You can enjoy watching him try to dive clear as the pilot flies in or out.
I've noticed a few other amusing things when leaving enemies alive. One time I'd left a patrolling Elite alive in the cavern, and when the Grunt arrived he said "Hey, no sleeping on the job". Another time I left one of the two bridge Grunts alive, and he really was sleeping on the job when the Shade gunner ran past.
Variations in setting up
As mentioned earlier, there are many options in setting things up. In this section I'll talk about them.
Skipping stuff
In my routine I said not to skip the indoor section after the first bridge, because otherwise you won't be able to trigger the bridge checkpoint or the one at the second tunnel corner thereafter (a strange dependency, but that's how things seem to be). However, those checkpoints aren't essential to setting things up, so you could skip the indoor section if you want to save time. An alternative to getting the bridge checkpoint would be to go back and trigger a tunnel checkpoint, potentially keeping it delayed until where you like. But you might not even want a checkpoint in the cavern. If you don't mind ending the music, all you really need is the checkpoint where it gets triggered to stop, as described in my routine.
Although it's essential to trigger enemies in the crashed Pelican area so the Grunt will have an instinct to run back, you could skip the two-Wraith area by flying high enough to avoid the trigger zone. Just fly above the high arch at the end of the Pelican area and stay at least that high until around the corner. However, when following the Grunt later you'll eventually trigger enemies behind you, so watch out!
Using the active camouflage
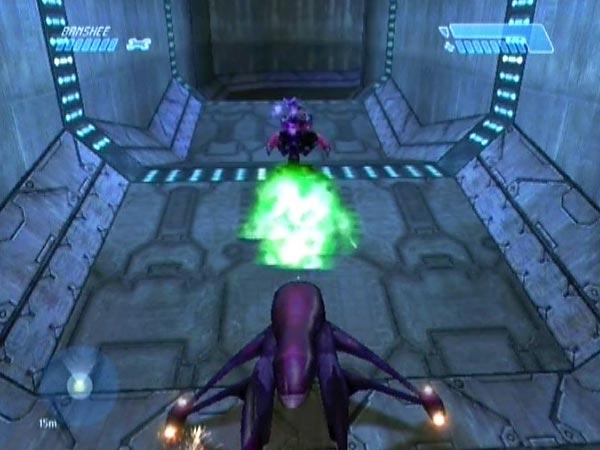
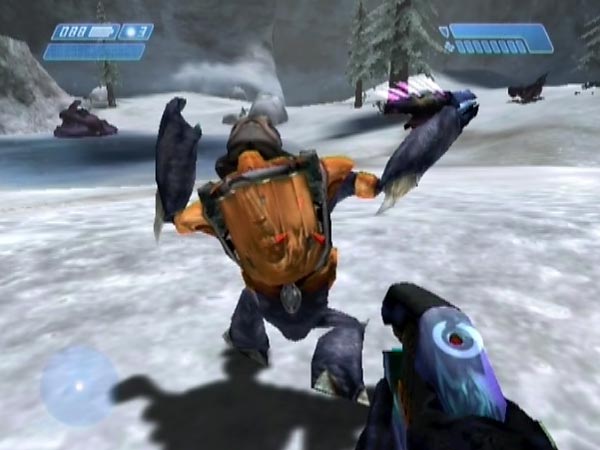
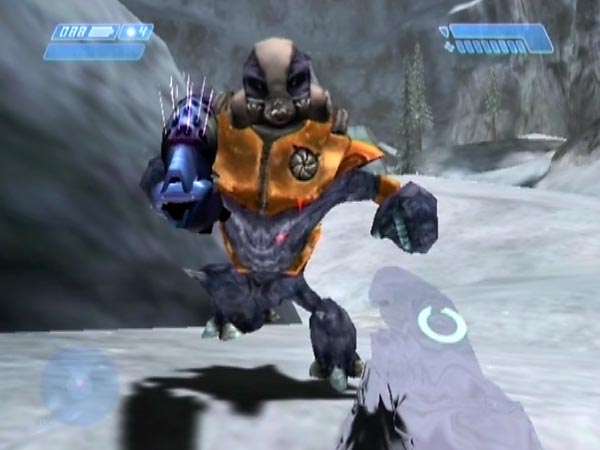
Back in the two-Wraith area was some active camouflage (if you've triggered the area) which you can use as follows. When you're ready to get the Grunt running, fly back and get cloaked. Quickly reboard and fly efficiently to the Shade and you'll have about 22 seconds of invisibility left, which is enough time to blast the Grunt out and then latch onto him soon after he starts running. You might like to blast him out with a plasma grenade so you can watch from the side (see pic); it makes an amusing sight to see him go flying. Note also that you could get a tunnel checkpoint on your way to the Shade, perhaps delaying it until past the bridge and treating it as the starting point for your fun.
This use of the camo enables you to see the Grunt close up after the ejection (no need to hide behind your Banshee like normal) and you can latch onto him a few seconds earlier. But on the minus side, obviously the camo won't be available for mischief later.
Leaving spare weapons around
You may like to leave some spare weapons along the running route so you have the option of swapping for them on the way, to vary your fun. For example, if you're not initially going to be carrying a rocket launcher, you could at least put one somewhere - maybe for a spot of Grunt launching at his destination, or maybe for using on enemies along the way. Actually the launcher is a bit of a special case in the following sense. When setting up, you'll need to carry one over the tunnel checkpoint or you won't have access to one at all. When you trigger that checkpoint, any launchers you're not carrying disappear!
Alternative ejection methods
Aside from blasting the Grunt out of the Shade with a carefully placed Banshee blast or grenade or even a rocket, there's also the option of pushing the Shade with the nose of a Banshee until it reaches such an angle that he pops out. Pushing it up against something can be a good way, either to topple it over or to get underneath it. It can be a bit fiddly however, and the ejected Grunt could easily get killed by subsequent contact with the Shade or Banshee (he tends to do a lot of diving clear, which can be amusing). Note also that if the Shade finishes upright, he'll hop back in unless you've quickly hidden yourself. Still, if you find blasting him out difficult - which becomes more of a possibility on Easy due to his relative frailty - it's an option.
Putting the Shade elsewhere
If you're wondering about moving the Shade further into the level so the Grunt has further to run, sadly there doesn't seem to be much potential there, due to trouble relating to loading zones. In the routine I described, the Shade was already placed close to the end of the Grunt's intended loading zone. There's scope for leaving it in the subsequent corner of the tunnel, but he wouldn't be able to start running until you come back over the loading point, so you wouldn't be able to latch onto him any sooner really. If you place the shade even further than that corner, you start running into problems with the Grunt freezing or disappearing; I won't go into the details.
However, you always have the option of putting the Shade somewhere earlier in the level, within the Grunt's intended loading zone. If you were to place it in the most remote far corner of the cavern, that would actually give him a bit further to run than in my routine, though it's very dark over there.
Leaving the Shade overturned
If you leave the Shade overturned rather than upright, the Grunt will spawn beside it or on top of it (assuming it's within his intended loading zone - else he might be absent). You're saved the task of ejecting him, but if he's beside it he'll be free to start running and may do so before you're ready, so you have less control. If he's perched on top of it (sometimes low down, sometimes amusingly high up), you'll have to get him off before he can run. The easiest way is to fly at him so he dives off. Other options are to sweep it out from under him with a Banshee leg, which is risky, or to try shooting him or the Shade.
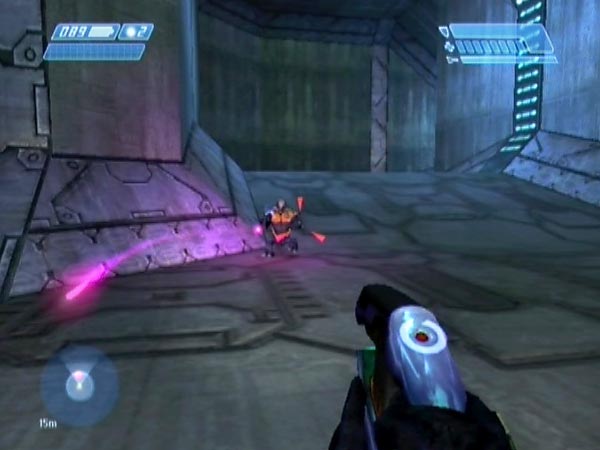
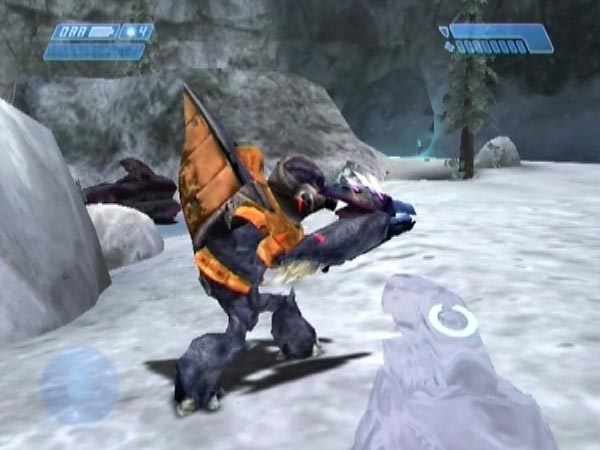
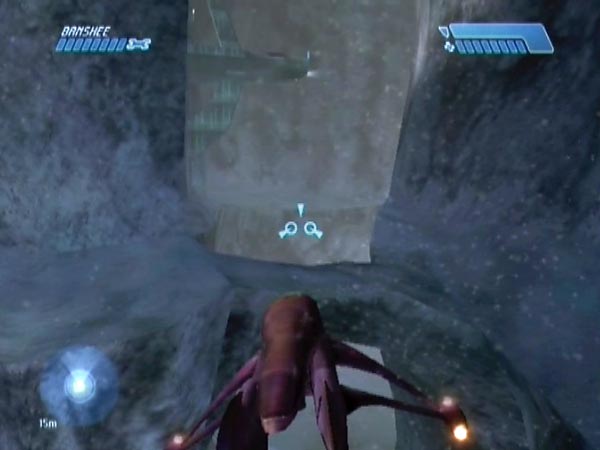
Perhaps the best potential benefit with an overturned Shade is that if the Grunt is behind it, you may be able to sneak around undetected to get behind him even before he's starting running (see pic). Moreover, you could then give him a nasty shock by firing a shot in the air, in which case there's a chance he'll panic. By doing this I was able to get him to panic all the way from the Shade to his destination! Another reason for using an overturned Shade would be if you're interested in having him start running while you're still a long way off. One time when I put the Shade on the far side of the cavern, he started running when I was still on the near side, just after killing the first two Elites.
Doing without a Banshee
Although I'd highly recommend getting and using a Banshee, it's not essential. For starters the Shade can be moved using the Scorpion or Warthog or both; see Shade moving for advice (and if you want to get the Scorpion to the Shade, you can get it over the 'step' by placing a Ghost at the left corner and driving the Scorpion up over it). Later on, the Grunt can be ejected with a plasma grenade instead of a Banshee blast. After ejecting him you could hide behind any vehicle or not bother hiding at all - though in that case you won't be able to latch on behind him until he's gone past and forgotten about you.
Further remarks
Otherwise known as Herbie
This Grunt seems to've become known as 'Herbie' in tricking circles, though I never personalized him like that myself (didn't even hear of the name until quite late), and it's worth pointing out that it's not just one Grunt really. Sometimes you get a red one, sometimes orange. Other aspects of his outfit vary too: face mask and whether the thing on his back is pointy or curved. Well, I suppose it could be one Grunt and he's got a lot of spare kit in his closet!
Anyway, it's been known for quite a while that if you descend from the bridge and move his Shade, he'll spawn in it regardless when you eventually trigger the ground battle. More precisely he appears in the air (you can get a glimpse of this if you've triggered the battle by backing through the door) and is then quickly moved to the Shade. The first time I was moving it around was back in 2005 when I learnt that you could get down off the bridge. In July 2007 there was the single-player video Herbie Does Halo by Juggertrout and BigGruntyThirst, in which the Shade is moved to various novel places, except that the title is a bit misleading because the final Grunt is actually an impostor (see here), something suggested by his non-passive state. In July 2008 there was the co-op video Herbie Goes Flying by slYnki (YouTube version available here), in which the Grunt spawns in his Shade as it's flying through the air. Poor little fella must be pretty dizzy by the time he lands!
Unexpected run
I'd messed with this Grunt quite a bit prior to stumbling into this pursuit fun. I was trying something else with him and had placed his Shade overturned in the corner past his loading zone. When I turned the corner to get back to the Shade (having flown past most enemies), I saw that the Grunt had already advanced my way, something I wasn't expecting. Naturally I was curious about where he was going. I was subsequently able to kill the bridge enemies while leaving him alive, and he toddled over the bridge and on, back to the crashed Pelican area where - once alerted - he was keen on needling me. It was funny following close behind him on the trip and I figured it could make a nice little movie. So that was the start of this fun.
Something similar with an Elite
You can attempt something similar with one of the Ghost pilots who spawn just past the crashed Pelican area. If you've moved his Ghost beforehand, he'll spawn in it - or near it if you leave it overturned. You can get him going on a run back to home territory, but I don't think it's going to be so amenable to fun because he runs so fast you can't easily catch up to him. I haven't spent much time on it though.