Crazy-firing Grunt on the tower
Posted May 4th 2014
Associated movies
- Introduction
- Setting up for ascent
- Ejection and pick-up
- Lifting and beyond
- Higher mid-lift checkpoint
- Single-stage lifting
- Further remarks
Introduction
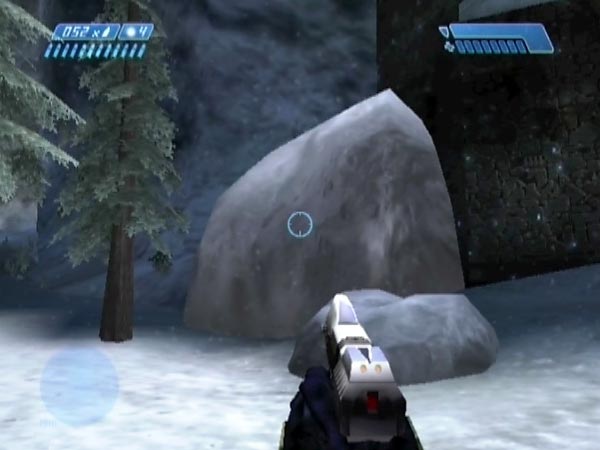
Back in early 2012 when I was making BCM46, in which a crazy-firing Grunt gets taken on a journey through the level, I had an idea. After ejection from his Shade, maybe the Grunt could be lifted up the side of the huge tower using the nose of a Banshee, to get him to the top? Because of his unusual nature, he wouldn't offer any resistance at least. He'd just fire his needler harmlessly the whole way up.
After looking around the tower and trying a few things, I realized that there was just one promising location for the lift. To the left of the balcony at the back of the tower, there's a huge rock in the corner; a corner formed by a dark brown wall on the right and a grey stone wall on the left. The rock comes in different designs at random, but one design gets high towards the corner, making an inviting looking peak there. If I could get the Grunt onto the rock, maybe he could be scooped up onto the nose in the corner, and then easily lifted up towards the top? It looked like the Banshee would fit nicely into the corner for doing the lifting.
Unfortunately it didn't turn out to be so simple. The angle at the corner - something like 100 degrees - is a good fit for the Banshee when level, but when you angle up to push the Grunt, a gap opens up between the nose and the corner, large enough for the Grunt to be in danger of slipping through, though you do still have some grip. Lifting him seemed a tricky business. I remember giving things a serious try and eventually having to put the idea aside, frustrated by never being able to retain the Grunt long enough to get him anywhere near the top. He'd tend to slip down; and once part way down, it was hard to recover.
I planned to try things again in the future though; and when Bad Cyborg's tenth anniversary approached in April 2014, I decided to give it another go, to try and mark the event with something special. And with the aid of better lifting technique and a carefully engineered checkpoint obtained part way through the arduously long lift, I was finally able to get him up, showing the process in BCM103 and BCM104. In this article I'll cover the details of the work, including options.
Setting up for ascent
In this section I'll describe the preparation work I did for my ascent, starting from a crazy-firing initiation checkpoint such as seen obtained in BCM45 at 3:20. This work is demonstrated in BCM103.
Get a hog and a new initiation checkpoint
You'll need a Warthog for much of the Shade pushing, so go back in a Ghost to fetch one. On your return, trigger and delay the dropship checkpoint, kill the Jackals if any (sometimes they can get removed by the game, something fickle relating to going back over the loading point), and use the checkpoint to form a new crazy-firing initiation checkpoint.
Get the crazy-firing Shade to the tower area
Get the Shade crazy-firing, then move it through the tunnel using the Banshee and hog. There are tips on that in the Going places section of my article on crazy-firing Grunts. When you near the top of the tunnel, you may like to consolidate with a delayed tunnel checkpoint before heading out to kill any dropship troops (note: you can end the delay in the tunnel corner just before where covies were found). Dropship troops can sometimes be missing - a quirk relating to your having gone back over the last loading point while the ship was descending. When things are safe, advance the Shade to the left of the tower - the back - but stop near the start of the ice patch, to avoid triggering tower troops yet.
Move the front Shade and maybe disable stuff
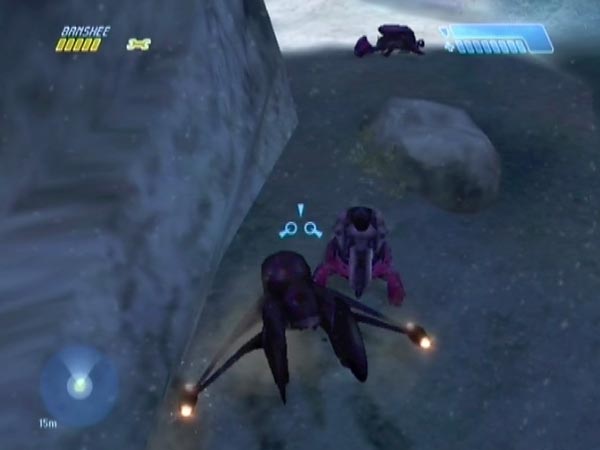
Board your Banshee again, and from initially above tree height - high enough to avoid the tower trigger - blast the front Shade towards the far corner of the tower. Once it's near there, you're ok to descend or dismount if you want, because you'll be outside the trigger zone. There's a small rock where the side of the tower starts angling left. Get the Shade approximately that far, and upright, and leave a good gap all around else the gunner might fail to board it.
Preferably also destroy the Wraith (easier than when it's manned) and disable the back Shade. You could also overturn the two far Ghosts, but actually I suggest leaving them alone because their Elites can later be easier to handle if they're aboard their Ghosts (depending on how you plan to tackle covies later). Note: you could've done any of this hardware manipulation earlier, after a bridge descent.
Consolidate by saving a delayed tunnel checkpoint. This is mainly to guard against the possibility that the front gunner fails to man his Shade later - something critical to the plan - but it also guards against getting yourself carelessly killed while tackling covies.
Clear the back of the tower
Approach the tower's back door to trigger some new covies, including the two Shade gunners. You might like to use the handy Ghost near the door, but really you can do your slaying however you want. In normal play you'd get some covies behind the back door, but you might not get them if you bypassed lots of covies earlier. Being careful not to trigger pass guards yet, kill all the new troops except for the front Shade gunner, who should've run to his Shade and boarded it. Check that he's aboard.
You don't need to enter the tower, but if you do, kill the cloaked guard (or two on Legendary) who spawns when you get far enough inside. Optionally, you could also trigger and kill troops at the tower's front door, but there's really no need. At any rate, don't kill any Elites near the front gunner before he boards, else he might panic in which case he'd forget his Shade for good.
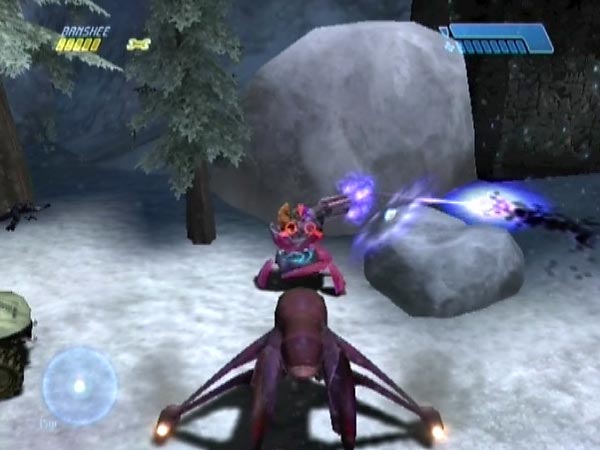
Progress to the balcony rock
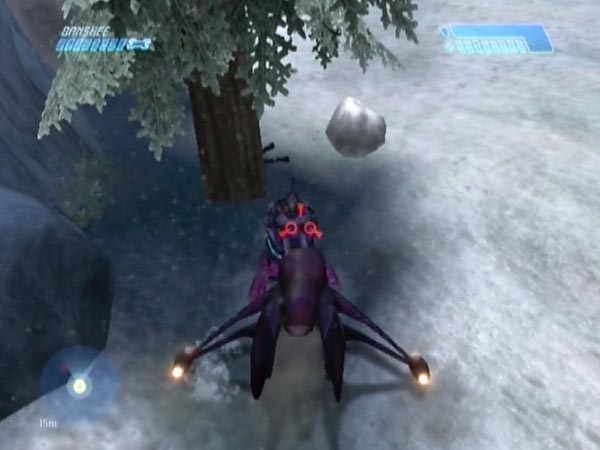
Taking a route around the back of the tower, move the crazy-firing Shade to its ejection configuration. Put it a few metres away from the balcony rock, with side facing outwards to ram. The Shade fire should be getting closely intercepted by the ground or rocks, so it won't be causing checkpoint delay any more. The picture here shows a good position, though perhaps it might've been better if the Shade had been rotated clockwise ten or twenty degrees.
Drive the hog into position, ready for driving towards the side the Shade. Also, overturn or take the tower Banshee to prevent later attack (or you could've done this earlier instead; you can do it any time before triggering the pass guards, which is when the pilot spawns too).
Get the right design and an ejection checkpoint
Fly back and trigger a tunnel checkpoint, but keep it delayed with Banshee fire for now. Check the balcony rock. It has five possible designs, and there's a particular one you want, in which the rock is high with quite a pointy top, as seen in my introduction. If you don't have that one, keep going back and recrossing the loading point until you do. That rock has the best shaped top for performing Grunt pick-up in the corner. The other high rock is a dubious second best, while the three lower rocks are really no good.
Keep the delay going until you're in the hog, then let the checkpoint come, and save it. This is your 'ejection checkpoint', for making attempts at getting the Grunt into lifting position on the rock. Note: if it turns out that the Shade fire is continuing the checkpoint delay, you could try adjusting its position with a bit of melee, while jumping to ensure delay continuation; then return to the hog and see if you then get the checkpoint.
Ejection and pick-up
With the Grunt ready for ejection, we're at the start of the ascent phase, demonstrated in BCM104.
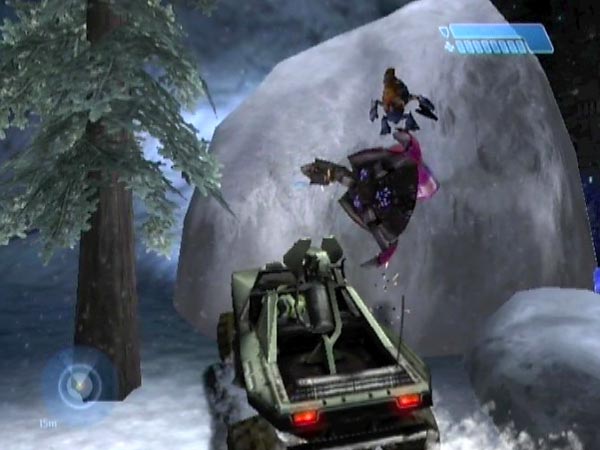
Get the Grunt into lifting position
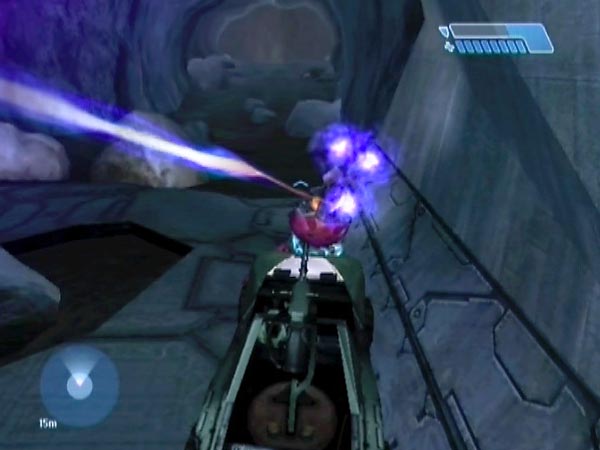
Eject the Grunt onto the rock by ramming the Shade, hitting it squarely on the side. It's important to hit low down though, or the Shade won't go up. When the hog drives forth it can bounce over the ground slightly, and you don't want it to be on the high point of a bounce when it hits the Shade, else you'll probably be hitting too high. So adjust your speed as necessary, to avoid that scenario. You don't need to be going at full speed to cause ejection. If your configuration was good, success should be quite easy.
When he's on the rock in a position where you'll be able to get at him, quickly make sure the needles are going away from him, to try and avoid his taking any. The Shade controls needle direction, so you may need to manipulate it to adjust the needle direction. Actually I suggest getting the Shade clear of the rock regardless, because you may want to tweak needle direction a few times later, after he's up the tower.
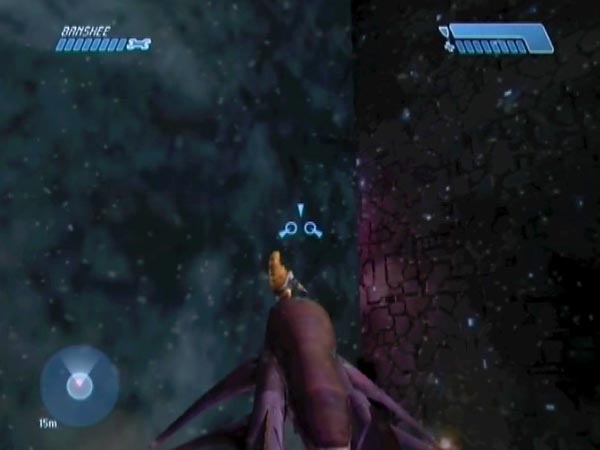
Now in your Banshee, gently nudge the Grunt into lifting position at the corner. He's very fragile, so be careful. The rock's peak is slightly back from the corner, and maybe it's best to have him on that peak. But if he overshoots and goes down into the slight depression beyond, that's still a viable position.
Get your lifting checkpoint
Trigger and delay the pass approach checkpoint (fly low near the pass) and kill the guards to make it safe there. Also fly up and kill the newly spawned Banshee pilot on the tower, unless for some reason you want to try and keep him around (he'd obviously be a hazard when you get the Grunt up there though).
Take up a position at the pass entrance, staying back from the trigger line for the next checkpoint - which is a short way into the pass. Basically you should be to the right of the huge entrance rock. End your delaying fire to finally get the pass approach checkpoint, and save it. If it doesn't initially come, that'll be because the game considers the distant front Shade a threat to you; but you should be able to fix that by using the rock to shelter you from it better.
Delay the pass checkpoint and perform pick-up
Trigger and delay the pass checkpoint just ahead (watch for red on your tracker if you want to be sure you hit the trigger), and fly back to the Grunt. By the time you're at his rock, the proximity of the front Shade will continue the delay for you even though it'll be hidden around the corner; so stop firing.
Ease under the Grunt to pick him up on the Banshee's nose. It may be best to angle the Banshee down as much as you can, and then if he slides up, start angling up. This is a delicate business and he's easily killed, so you may have to revert to your lifting checkpoint multiple times before he's up. I think it can depend quite a bit on his position and angle, as I've had some situations where pick-up felt pretty easy, and others where I had more trouble. But I can't really say more than that.
Lifting and beyond
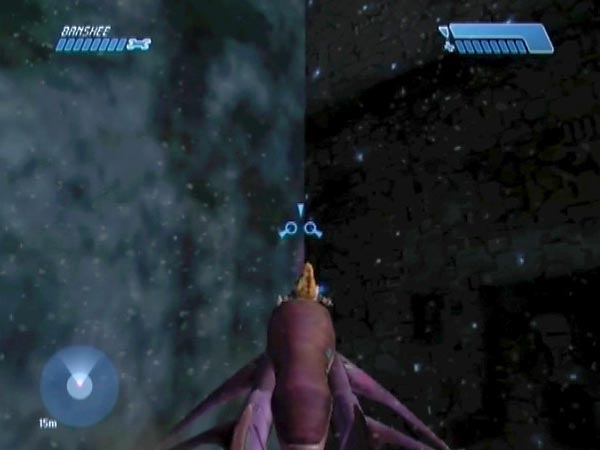
Now you've got the Grunt picked up on the Banshee's nose, it's time for the actual lifting - the hardest part of the whole enterprise.
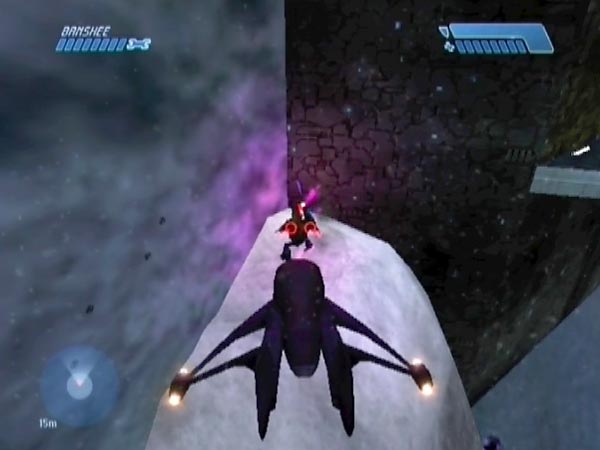
Suggested technique
My suggested technique for lifting is to first ease the Grunt upwards and right of the corner. Ideally you should get him to a bit more than a Grunt's width from the corner, and try to maintain that as you slowly push him upwards. You can't go very fast else he'll bump out of position, which spells trouble (you'll need to do some recovery work). Even if he doesn't bump, he'll tend to slowly drift one way or the other, and you have to work against that to try and keep him where you want. It's a delicate business which may take you a good while to get the knack of.
Part of my rationale for having him a good distance away from the corner is that if he does bump left, at least he'll hopefully still be clear of the loss-prone corner, allowing you a better chance of recovery.
To try and help prevent the Banshee building up unwelcome spurts of speed which could make the Grunt bump to the side, you might like to try 'pumping' the Banshee thrust, i.e. increasing and decreasing. You may find that more reliable than trying to maintain a steady thrust.
With good speed you could potentially be up near the top of the tower within six minutes, but in your early experiences you'll probably be going much slower. Just remember, stability is the key. As long as you can keep in control, you'll eventually get up there even if you're only going really slowly.
Problems
If the Grunt 'bumps' to the side, you'll need to do some careful work to try and retrieve the situation. In particular he may end up in the corner, in which case you'll want to gently ease him back out again.
Another common problem is when the Grunt gets so far away from the corner that the Banshee is no longer braced by the walls. At that point, control is hard, partly because the Banshee has a somewhat delayed response to your inputs, which can cause you to repeatedly veer left and right in your efforts to stabilize. If you can get stabilized, you can then try to ease him back to where you want.
Two other problems are what I call side-slip and back-slip, where the Grunt starts slipping down a wing or over the back of the Banshee. I think you're unlikely to be able to recover from side-slip; and back-slip is even worse. I suspect that the potential for back-slip grows during unbraced lifting. In doing that, the Banshee needs to angle up more, which changes the geometry under the Grunt.
Another problem is that the Grunt may start going through the wall! Once he's a short way through, I don't think there's anything you can do. He'll soon go all the way then fall into white nothingness - which you can actually briefly see if you angle the Banshee steeply down against the wall (you'll be looking at where the inside of the tower would be, but the game hasn't actually loaded that). Going through walls is a strange phenomenon, but fortunately it seems rare.
Alternative techniques
In my introduction I mentioned how it's problematic trying to lift the Grunt up the corner itself, because when you angle up, a gap opens in front of the nose and the Grunt is prone to slipping down through it. By all means experiment with this though. It's certainly possible to go a good way, and perhaps you can manage to keep him up. I found it too frustrating, but let me also mention that I'm using PAL Xbox. For all I know, things may be a little different with NTSC/PC, giving you slightly better grip on the Grunt.
Another option is to take him up the grey wall rather than the brown. In other words, use the left rather than the right. However, I've got the impression that the Grunt is much more prone to going through the grey wall than through the brown. Indeed, that problem was a key reason why I was originally unsure if it would be possible to get him to the top. Hence I now favour the brown. Really I ought to do some proper testing to be sure if there's really a difference, but by all means try the grey if you like. I'd suggest sticking to one side or the other though, because your controller work is different in each case. After getting used to using the brown, I notice that I feel quite clumsy if I try to use the grey instead.
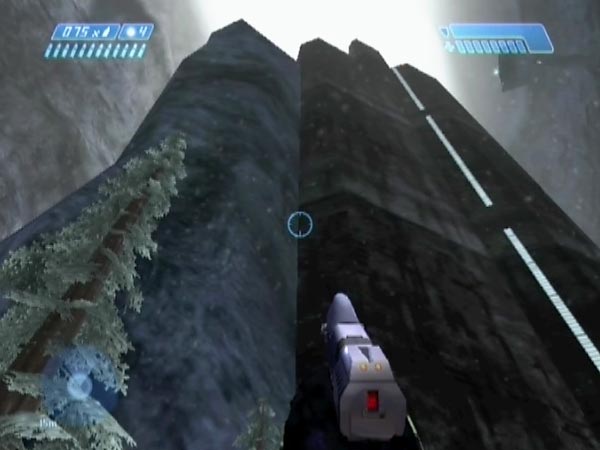
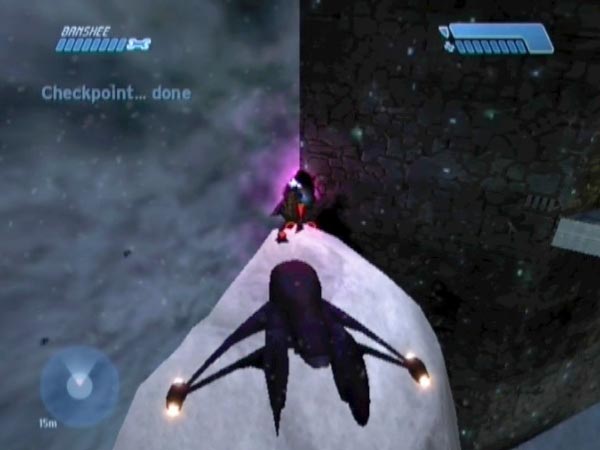
The mid-lift checkpoint
When you get sufficiently far from the front Shade which you carefully repositioned, the game judges it no longer a threat, so the checkpoint delay ends. You thus get a very valuable 'mid-lift checkpoint', consolidating your progress. With the Shade near the tower corner as I described, the checkpoint will be near where the brown wall is about to change to a lighter shade (there's quite a sharp dividing line).
It's a good way up, but there's still a much longer way to go, and it can become quite taxing to maintain your concentration. It can also become a bit of a strain on the eyes, because you're seeing basically the same view the whole way up. However, with good speed and no problems, you could reach the snow within four minutes. So if you're good at lifting, the strain needn't last long.
Choice of routes near the top
Up near the top, you have a choice. One option is to continue up the brown wall, which would take the Grunt directly to the platform (though there's a rim at the top to get over, which could be a bit ticklish). However, the Banshee will be unbraced, making control difficult. Also there may be a problem with the Grunt slipping down over the back of the Banshee before you make it.
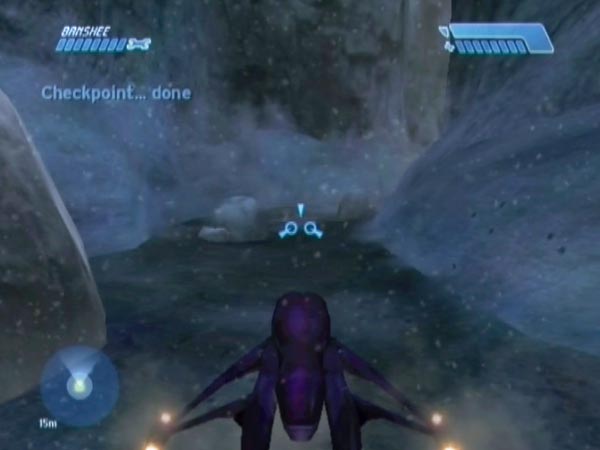
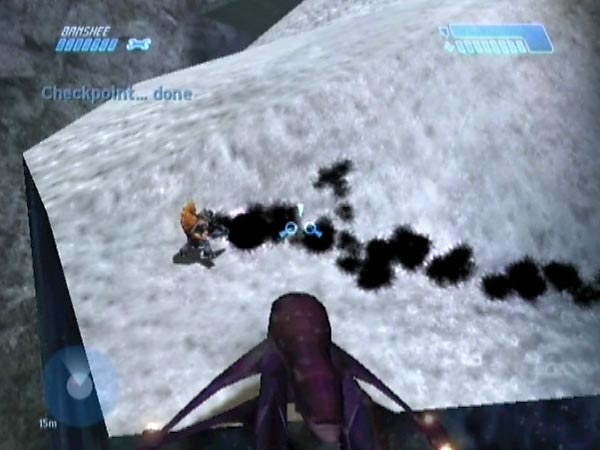
The much easier option I think, is to ease the Grunt onto the low snow. It's very steep near the brown wall, but if you can get him looking stable (which may take some delicate nudging), you can then fly off to trigger and delay a checkpoint, getting it back at the Grunt. The next one available is the Marines checkpoint, associated with triggering the Marines in the spiral path area. You can then ease him along to where the snow is less steep, and things become much easier. You can continue on to the top of the tower with gentle low-speed nudging, consolidating progress with further checkpoints as desired.
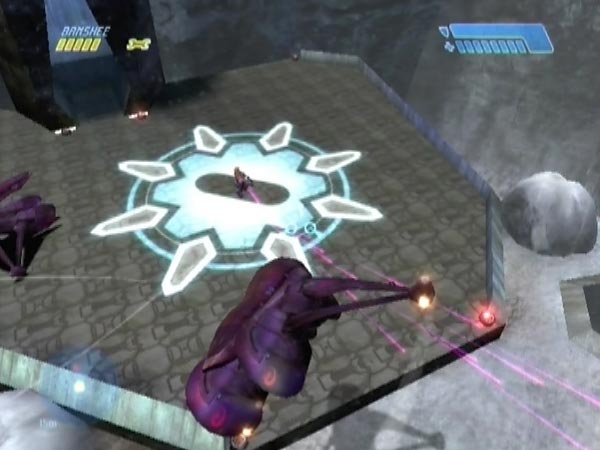
Getting him onto the platform is quite easy. It looks like you wouldn't be able to push him up the tall step which forms the entrance, but surprisingly you can. Just angle the Banshee down and nudge gently. In BCM104 where I was new to things, I didn't know about that. Fearful of squashing him against the step, I instead nudged him onto a small rock nestled against the platform rim, and then, after making his needles point away, pushed him over the rim. Waste of time, ha ha.
Checkpoint availability
There are a further four checkpoints available for progress consolidation and final saving if you want them. Namely the underpass checkpoint (by which time the dropship music will be playing), the zigzag path checkpoint, the pilots checkpoint (which will stop the dropship music), and the door checkpoint. If the Grunt's needles aren't flying far, you should be able to get the checkpoint when actually at the Grunt, rather than having to be in another zone. Sometimes I've had trouble ending a checkpoint delay at the Grunt though (when I thought I'd get it), or even ending it anywhere; so things can be a bit fickle because of the needles. The closer they're getting intercepted, the better.
Note: If you trigger the pilots in the twin bridges area, bear in mind that the Banshee pilot will transport to his Banshee wherever it is, if it's empty; and if it's upright he'll board it. You can prevent any of that by being aboard the Banshee yourself, at trigger time.
Warning: I suspect that you won't be able to utilize tunnel checkpoints from earlier in the level. Any time I've tried crossing a loading point, my needling Grunt has got removed by the game.
Higher mid-lift checkpoint
If you'd like to get the mid-lift checkpoint a bit higher, here's what you can do. After getting the Grunt into lifting position on the rock, advance the front Shade to the big tree at the corner of the tower, so it's pretty much against the trunk and so the trunk is between the Shade and the balcony rock (so the Shade won't have a firing line on you when you're lifting - something it would be prudent to check). This adjusted position will be closer to you when you're lifting, hence the checkpoint will be delayed until you're higher than before. It'll be almost at the top of where the brown becomes light (approximately the height of the low ledge around the tower area).
It's an increase of several metres, and I think it's worth it because you're probably going to be making many more attempts at the extensive stage 2 lifting, compared to the stage 1 lifting needed to achieve checkpoint height. It'll save you those several metres on every attempt. The only reason I didn't use this option in my original ascent covered in BCM103 and BCM104 is that my movies were going to double as tutorials and I didn't want to include an extra complication in the set-up procedure.
Single-stage lifting
If you're willing to forego a mid-lift checkpoint, you can simplify the set-up work as follows. Firstly, ignore all the business about the front Shade; you never need have any dealings with it. Secondly, after getting the Grunt into lifting position and killing the pass guards and Banshee pilot, get the delayed pass approach checkpoint at your Grunt, ready to start the lift.
Very little set-up work is saved however, so I think the only good reason for setting up single-stage lifting is if you're interested in getting up in one continuous lift as an achievement (possibly against the clock).
Getting the checkpoint after pick-up
With one alteration you can get the delayed checkpoint after performing pick-up if you like - though you could easily fail and have to try again. When near the rock and still delaying the checkpoint with Banshee fire, dismount and continue the delay with a high grenade throw, then quickly reboard and perform pick-up. After the grenade explodes you'll get the checkpoint. Of course, your pick-up will need to be quite fast as you won't have much time.
If you'd like a bit more time for pick-up, here's an alternative delay continuation method. From up in the mist near the ceiling, angle down and fire the fuel rod cannon, then descend to the Grunt (freefall for maximum speed). After a while the shot will only move slowly (weird glitch), and this can give you at least 10 seconds to perform pick-up. When it expires you'll get the checkpoint.
Further remarks
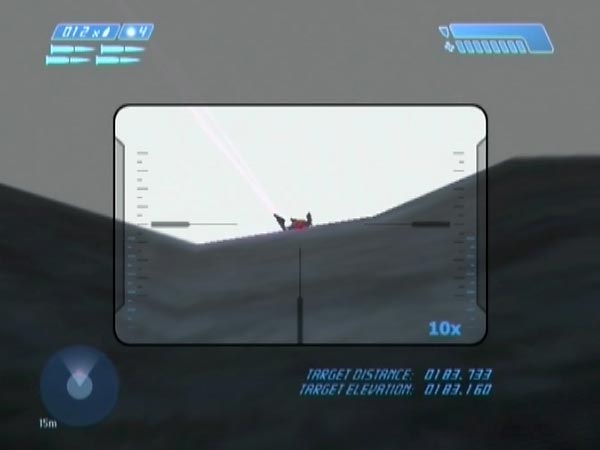
Tower height
By moving the Grunt to the edge of the tower and looking almost vertically up at him, and reading the target elevation, I'm able to conclude that the tower is about 183 metres high, not including the small housing on top. Just in case you were wondering.
Other ascent locations?
It looks to me like the ascent location I've described is maybe the only viable one, suitable for both pick-up and subsequent lifting. I've been able to start lifting the Grunt in at least one other place, but he had to go up the grey and he tended to disappear through it.
Can't use a normal Grunt
Trying to lift a normal Shade Grunt ejected onto the rock is no good. For starters it would be much harder to get him onto the nose of the Banshee because he'll tend to hop around or even dive clear. But he'll also shoot at you, even when you do get him on the nose. So even if he stayed still once being lifted (which doesn't seem to be the case), you'd never be able to get him to the top in time before blowing up. It's crucial to have a Grunt who isn't going to attack.
An old video
That Grunt has actually been on top of the tower before. You can get him in various odd places by moving the Shade there first and then letting him spawn in it, a dynamic exploited by Juggertrout and BigGruntyThirst in a video called 'Herbie Does Halo' released in 2006. However, with that method of getting him on the tower, he'll only be passive - which relates to his being outside his normal loading zone.