V-clip Shade ride method
Associated movies
In this method you blast the near left Shade off the bridge with yourself aboard, so it clips the top of the V then falls to the ledge and bounces off to the ground (though it's also possible to end up on the ledge). Suitable for PAL, probably no good for NTSC/PC.
Full description for the general plan
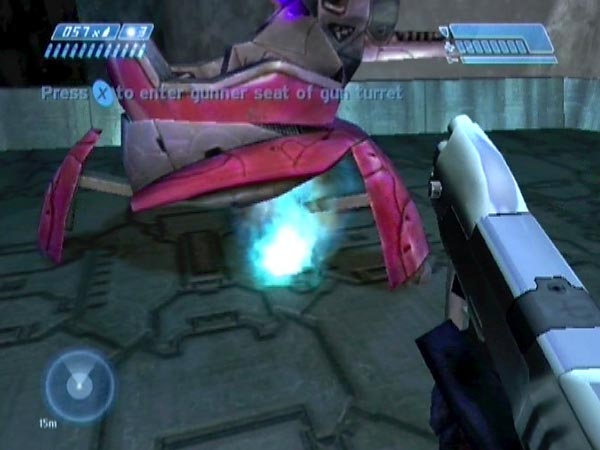
Throw a grenade close to the front right leg of the near left Shade and board it, so the Shade gets blown over the rim of the bridge and down towards the top of the V with you still aboard. The grenade will probably need to be under or almost under the Shade, to get the right trajectory and to keep you aboard. If it's too far from the Shade, the blast tends to eject you. Either type of grenade is viable, though the aiming for a frag would be different to take into account how it bounces around.
Assuming you remain aboard, you'll lose health from the blast (an increasingly large amount, the lower the difficulty level). If there are enemies around, a frag can be preferable or even essential because it detonates quicker, getting you away from enemy fire faster.
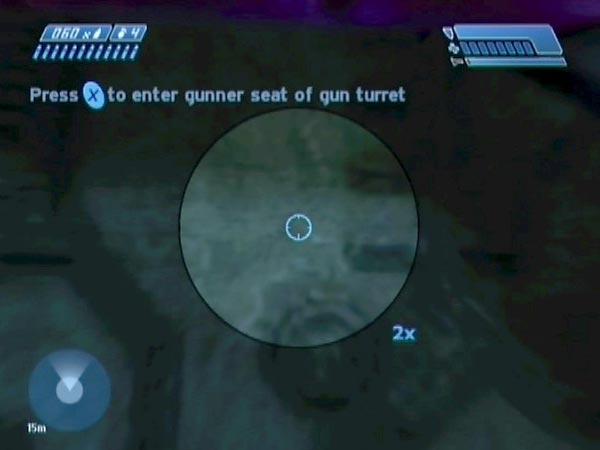
You want the Shade to clip the top of the V so it slows but then continues on down towards the ledge, with you still aboard. Your grenade positioning is crucial for this. The ideal position seems to be roughly as shown in the picture; namely very close to a small circular impression on the floor just behind the front right leg. A grenade in that area gives the Shade some chance of clipping the ledge with a leg, though there's still a significant chance you'll be ejected.
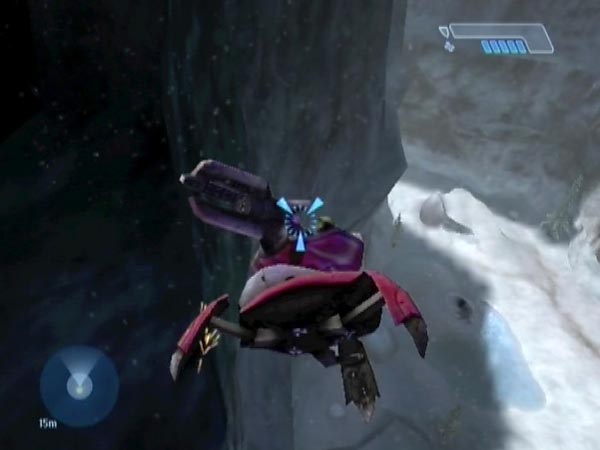
From here on the situation is similar to the V-start Shade ride method. The standard way the descent could reach a successful conclusion would be for the Shade to bounce off the ledge and take you down to the snow - though the ledge impact could hurt or kill you, and so could the ground impact if you happen to land head first. But to be in with a chance of hitting the ledge, the Shade needs to be very close to the cliff face when you clip the V, and it needs to fall pretty much straight down from there. A small amount of speed away from the cliff face can easily cause a fatal miss. The margin for success is very narrow.
There are two other possibilities for getting down. A heavy impact with the ledge could jolt you out and leave you alive there, or perhaps you could dismount beforehand to end up on the ledge deliberately. If you do end up on the ledge, you can get down as described elsewhere.
Precise grenading for surefire success!
For the general approach described so far, the odds of success are pretty slim. Indeed, success tends to feel quite random, and you could be forgiven for thinking that it truly is. But actually the dynamics involved are deterministic, and if you aim a grenade with sufficiently high precision it's possible to guarantee success (assuming you've eliminated any serious covie threat), because things will work similarly every time. That's what I found when I investigated after refining the grenade throwing for the other two Shade riding methods. It completely transforms the situation, making for something quite unique in the bridge descent business.
I'll describe two surefire methods now: one for a frag and one for a plasma. You can see them demonstrated in BCM180. They make use of a zoomed pistol for maximum precision and thus greatest control. I favour the frag method because it's a bit simpler in terms of positioning and because the aiming is a bit clearer, but you do take slightly more damage from the blast.
Surefire frag method
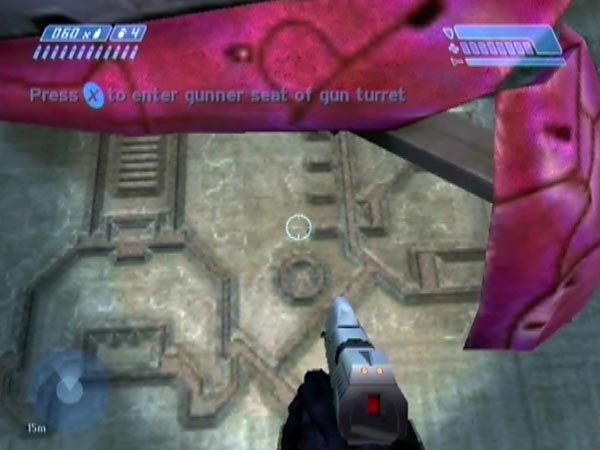
Move into the niche just behind the Shade's front right leg to get a fixed position (it'll be exactly the same every time). Just beyond the small circular impression near the leg are some divots in a line. To the left of the first is a short faint white line, horizontal as you look at it. With a zoomed pistol, aim just left of the line and up a bit. More precisely, imagine the line as the base of a square, and imagine an adjacent square on the left. You should target the centre of that. One way of doing it is to first target the line so it stretches across the middle of the reticle, then pan left a reticle diameter, then up by half. But you could do it another way if you like; only the final aim matters. With practice you can potentially just zero in directly and tweak your aim as needed.
Throw the frag (you can do this while still zoomed), and let it bounce at least once before boarding. It bounces off the ground then off the base of the Shade before settling. The reason for the slight wait is that otherwise the frag can be deflected by your legs, which would mess things up. You can board as late as you like, as long as it's before the blast.
When you reach the snow the Shade will typically settle upright, or at least land in a safe way. Indeed, the exact grenade aim was chosen to maximize landing safety like that. Certain other aims are viable (e.g. simply to the left of the white line, without then panning up), but may give hazardous landings which could damage or kill you.
How exact do you need to be with your aim? The critical aspect is your lateral aim. If you deviate left or right by as much as half a (zoomed) reticle radius, you'll probably die. Deviating up or down isn't so critical though; there's more leeway there. You could actually be off by a full radius and still be pretty safe, though the landing may be rougher. Overall, there's enough leeway that success is guaranteed as long as you're suitably careful. That's the sense in which things are 'surefire'. Of course, if you rush things you're likely to introduce some risk of failure.
Surefire plasma method
Now for my surefire plasma method. For a couple of reasons it's problematic to use the side niche for positioning, but I found an alternative. Instead go around to the front of the Shade to use the front niche formed by the leg. Get into the niche then crouch and wedge yourself in as far as you can go; you can advance slightly once you crouch. This gives you a fixed position.
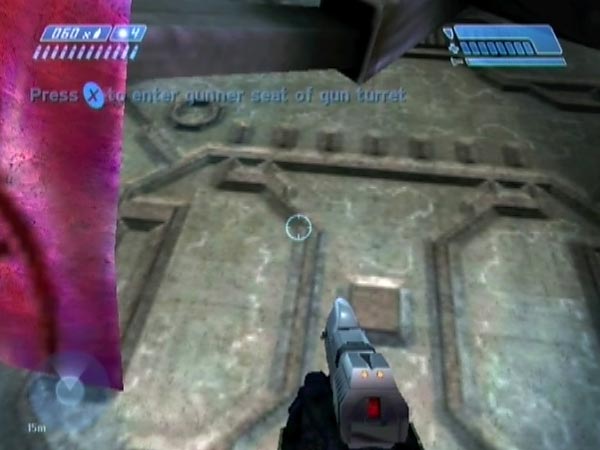
With a zoomed pistol you'll be able to see a tiny dark dot, as seen in the second picture here. Get your aim so the dot is obscured by the right of the reticle (the dot should be level with your aim). One way to do this is to first target the dot then pan left by a reticle radius. But you can do it however you like. Then throw your plasma and board. Except, don't board immediately else the grenade can stick to your leg, which will really ruin your day (though strangely the blast doesn't kill you; or at least not on Heroic). Allow it to hit the ground first; that seems enough to be safe. You can board as late as you like, as long as it's before the blast.
When you reach the snow the Shade will typically settle upright. As with the frag method, the exact grenade aim was chosen to maximize landing safety like that, though certain other aims are viable too.
How exact do you need to be with your aim? The critical aspect is your vertical aim. If you deviate up by as much as half a (zoomed) reticle radius, you'll probably die, so be careful with that. There's a touch more leeway for deviating down, and significantly more for deviating left or right, though deviation can result in a potentially dangerous landing.
Checkpoint advice
To make things as easy as possible for repeat attempts when doing things without precision, get a delayed checkpoint when ready to throw your grenade. If using a 'surefire' method though - obviously recommended - there's no need to trouble yourself with such a checkpoint at all.
Difficulty and system differences
When done 'old style' without precision, this method is very fickle, even after you've honed your grenade placement to maximize the chance of a good clip. At first I was only rarely able to succeed, but when I honed the positioning of a plasma grenade thrown from some way off the Shade, I eventually managed a success rate of about 13% when making repeated attempts from a checkpoint in the passage during the making of BCM33. Even when you get a good clip though, you're often ejected. It depends a lot on how much the Shade rotated, and it's pretty sensitive. And even if you remain seated, the Shade will probably miss the ledge more often than not.
Things are completely different when you instead use a precision-based 'surefire' method, the possibility of which I only realized years later. The only skill needed is that of careful aiming, and that's quite easy.
As for viability on NTSC or PC, my precise grenading has been tried on PC but sadly you get killed just before reaching the ledge. However, perhaps some alternative precise grenading might be able to effect a special trajectory which allows survival to the ground? The reason I mention this is because of Spotcheck's freaky PC descent using a Shade, as mentioned on my page for the V-start Shade ride method, though he wasn't riding it off the bridge. Precise grenading could surely be used to get the Shade to clip the V in the same way seen in Spotcheck's video. And since he was able to ride it down from there, hopefully so could you! Ideally you'd already be aboard; but if for some reason that doesn't work (maybe the clip would eject you because of the Shade angle), you could board on the V instead, like he did. Definitely worth checking into!
History and links
The history here is a little hazy, but the method seems to go back to at least October 2004. In a High Impact Halo forum thread from that month, zels mentions how you can get down on the left by making sure the Shade hits the V before continuing down to the ledge. But it's just a passing mention rather than an announcement, and there's no indication of whether you're meant to be aboard the Shade when it gets blasted, or whether you board it as it's heading over the rim.
As far as I know, the first video appearance of the method was from 3rd Person (aka WLT) in his Pacifist speed run advertised in the High Impact Halo forum on March 23rd 2005 (possibly only released a day later though). I don't have a link for the actual video (which I haven't seen), but in 2011 he released a demo of the method on YouTube, entitled AotCR Fastest Bridge Descent (Speedrunning), which was advertised in the High Speed Halo forum. For PAL speedrunning this method used to be the fastest, but it can potentially now be beaten by a few seconds, by the plateau base rock method.
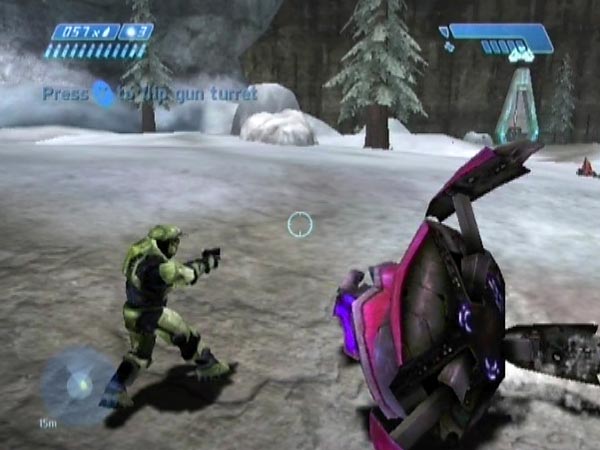
You can see the method demonstrated with a plasma grenade as the final descent in BCM33, starting at 3:31. As you'll see, the Banshee is diving in on me as the Shade hits the ground, which is what you can expect on Heroic or Legendary if you did the descent right away. This time the pilot gets a nasty surprise though! You can also see the method demonstrated twice with a frag grenade in BCM61 starting around 4:22, the second version giving a slightly earlier launch by throwing the grenade sooner.
Juggertrout clips the V in his 2007 video Tribute to Assault on the Control Room (advertised here), on the second descent starting around 0:35. The placement of his plasma grenade is noticeably different to what I've suggested, and the nature of his clip is correspondingly different.
In May 2016 I released BCM180 and updated this page to cover the business of precise grenading, which radically improves things, allowing surefire success. That work was prompted by having recently refined the V-start Shade ride method with very precise grenading. It struck me that the V-clip method could possibly be made surefire if only a grenade could be placed accurately enough, since the throw is the only skill element. My surefire methods were the result of a fairly extensive search for good grenade aims. Aims which not only guaranteed success but which were also handily landmarked by features on the ground, allowing them to be achieved reliably enough. In retrospect it seems kind of odd that I didn't consider this sort of precision years ago. I did hone a plasma throw to significantly raise my success rate (to a mere 13%), but all that did was get the grenade into the right sort of area, to give an appreciable chance of success. It wasn't done with the aid of having fixed my position - a critical element of the new precision - nor was I using a zoomed pistol. Back then, I think I assumed things were still going to be a bit random; so that relatively casual plasma honing was as far as I went.
Possible variation using the other Shade.
It may be possible to get down in a similar manner using the Shade on the right, but I think you'd need a lot more luck clipping part of the V in a suitable way. I never managed it, though I did come close once, touching the V and then the ledge, but dying just before the Shade reached the ground. I don't plan on exploring this avenue any further, as success seems so unlikely. Just thought I'd give it a mention for completeness.